- Shadow Empire: a 4X where professionals talk logistics
- Shadow Empire interview, with Victor Reijkersz
- Let’s Play Shadow Empire: Oceania! Part 1: The Rise of Avalon
- Let’s Play Shadow Empire: Oceania — Part 2: War of the Machines
Welcome back to my Let’s Play of Shadow Empire.
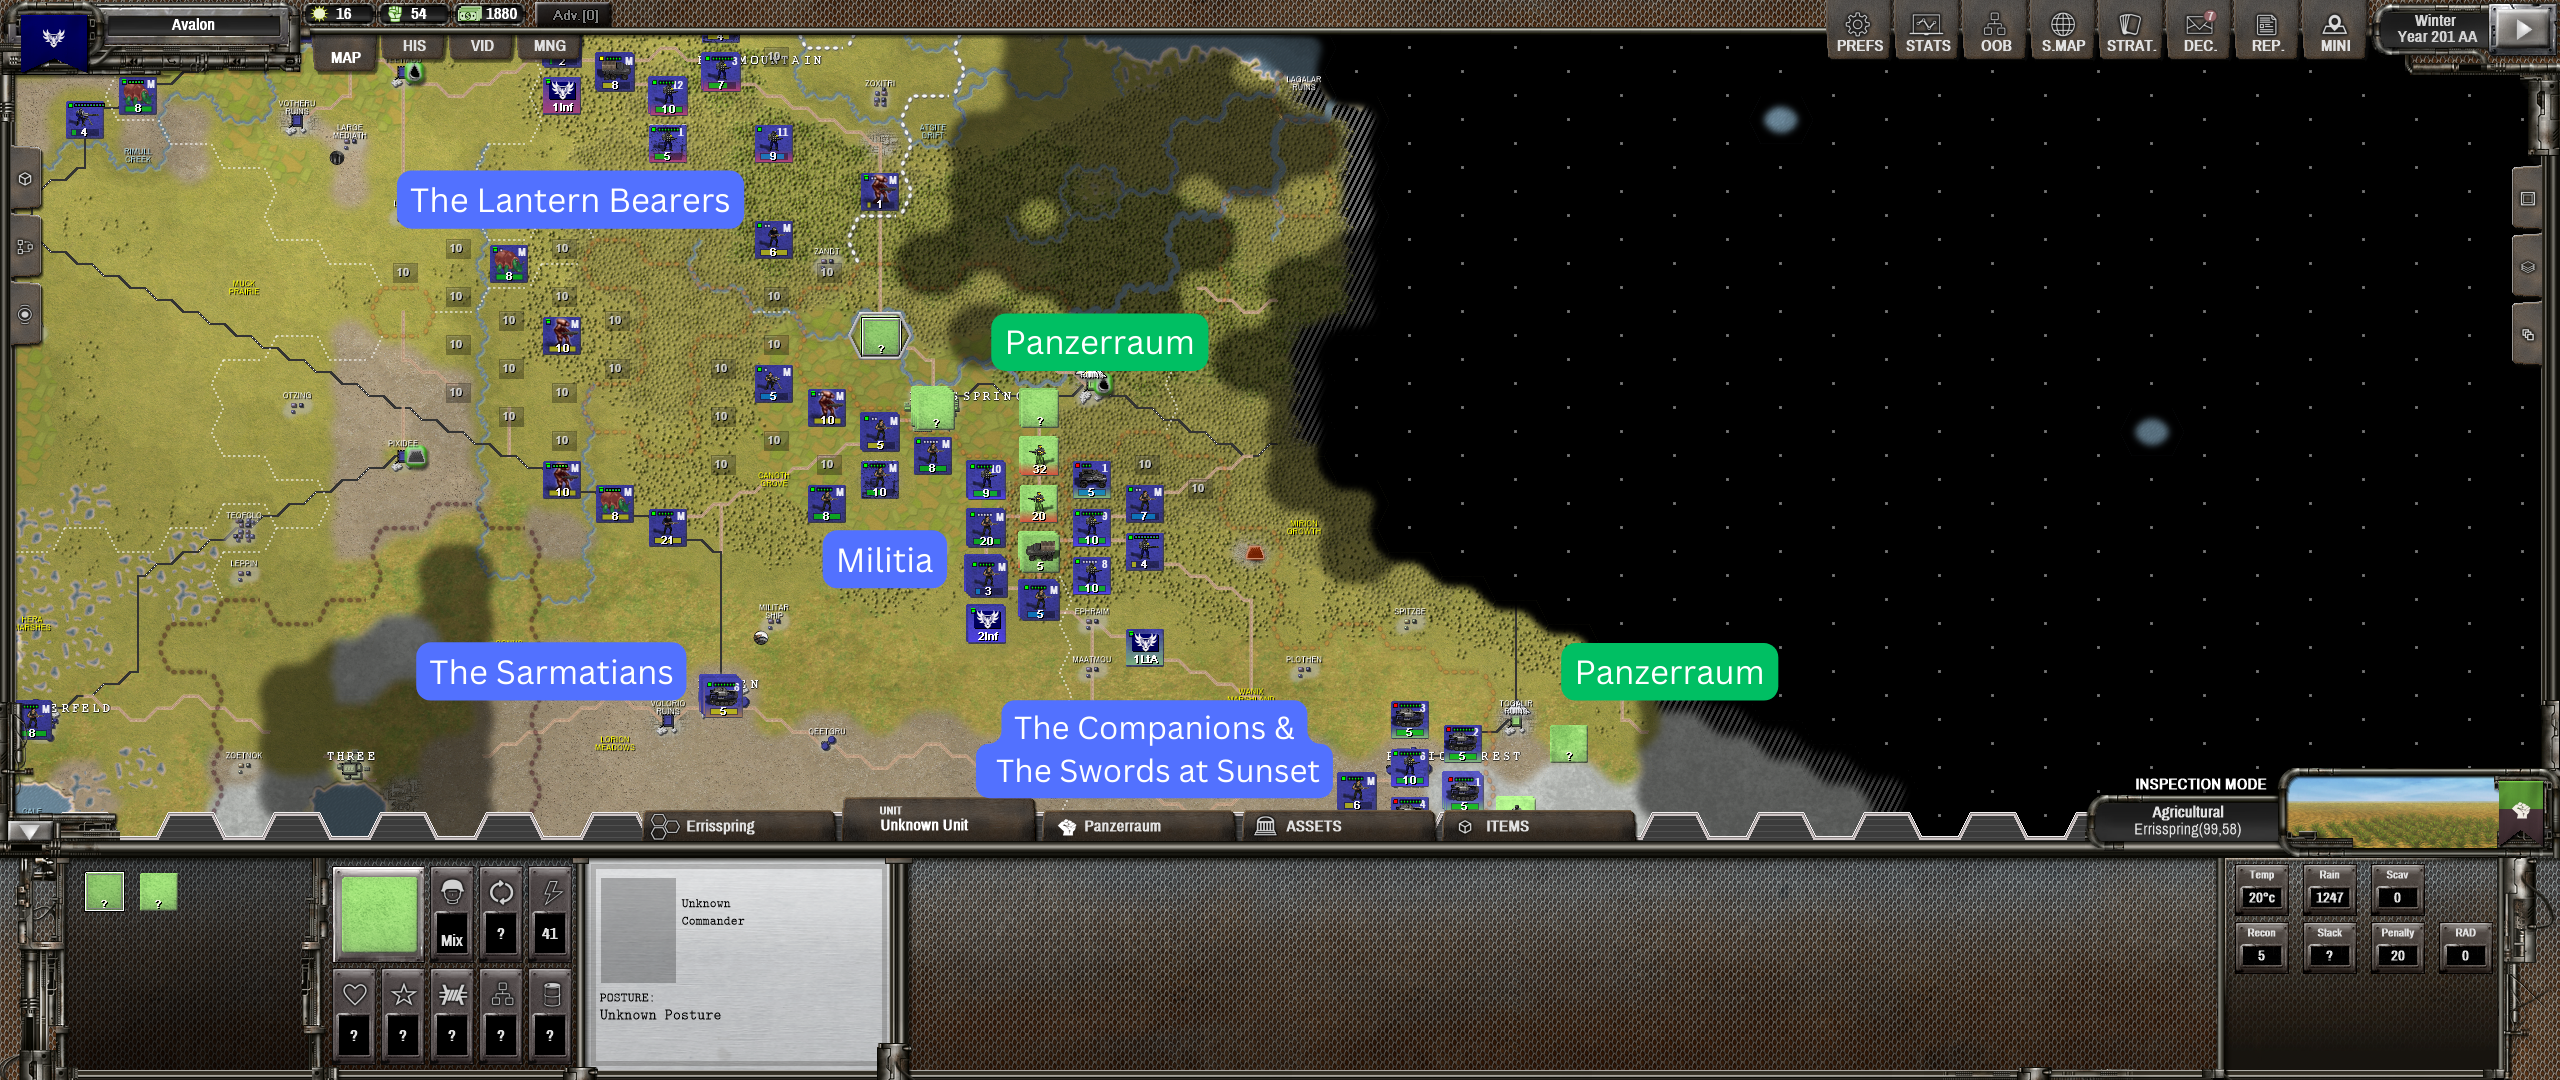
This was the situation at the end of Part 1, with my army fighting the militarists of Panzerraum:
Enjoying the site? Subscribe via email below.
ENEMY CAPITAL IN SIGHT!
War over by Landing Day?
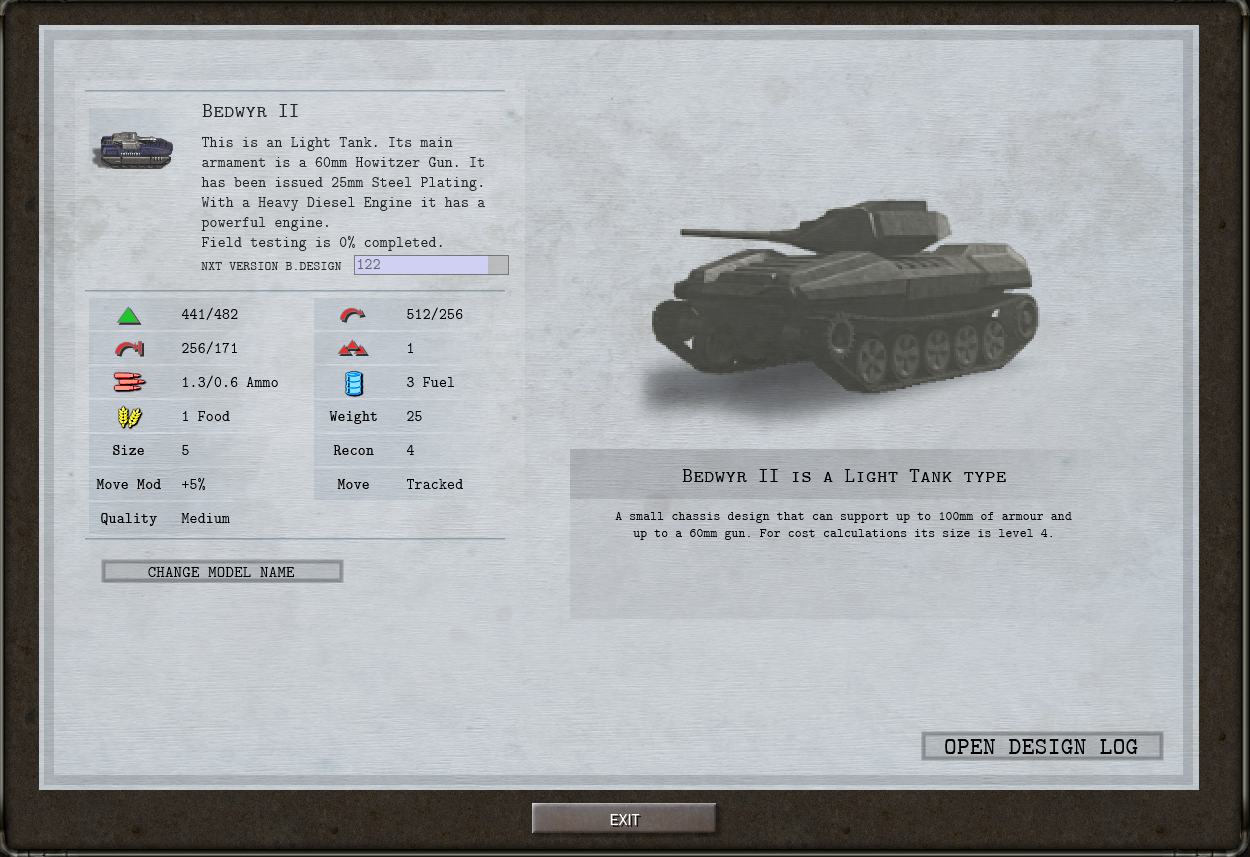
As Part 2 opens, the vehicle designers bring good news. Despite only incorporating a limited amount of new technology (side skirts that increase protection against infantry anti-tank weapons), the Bedwyr II has significantly better stats than the original. Extensive use in battle has improved the Bedwyr’s design stats, benefiting subsequent iterations.
To the west (around the middle of the map, above), Panzerraum digs in around the city of Errisspring. This was originally the capital of one of the farmer city-states that began the game next to me — Panzerraum conquered them not long after declaring war on me.
Unfortunately, the AI has chosen the wrong place to make a stand. The Lantern Bearers advance from the north. The Sarmatians, the Swords at Sunset, and a lot of militia advance from the south and west. Between them, they trap and encircle the defenders.
The siege of Errisspring becomes a foregone conclusion:
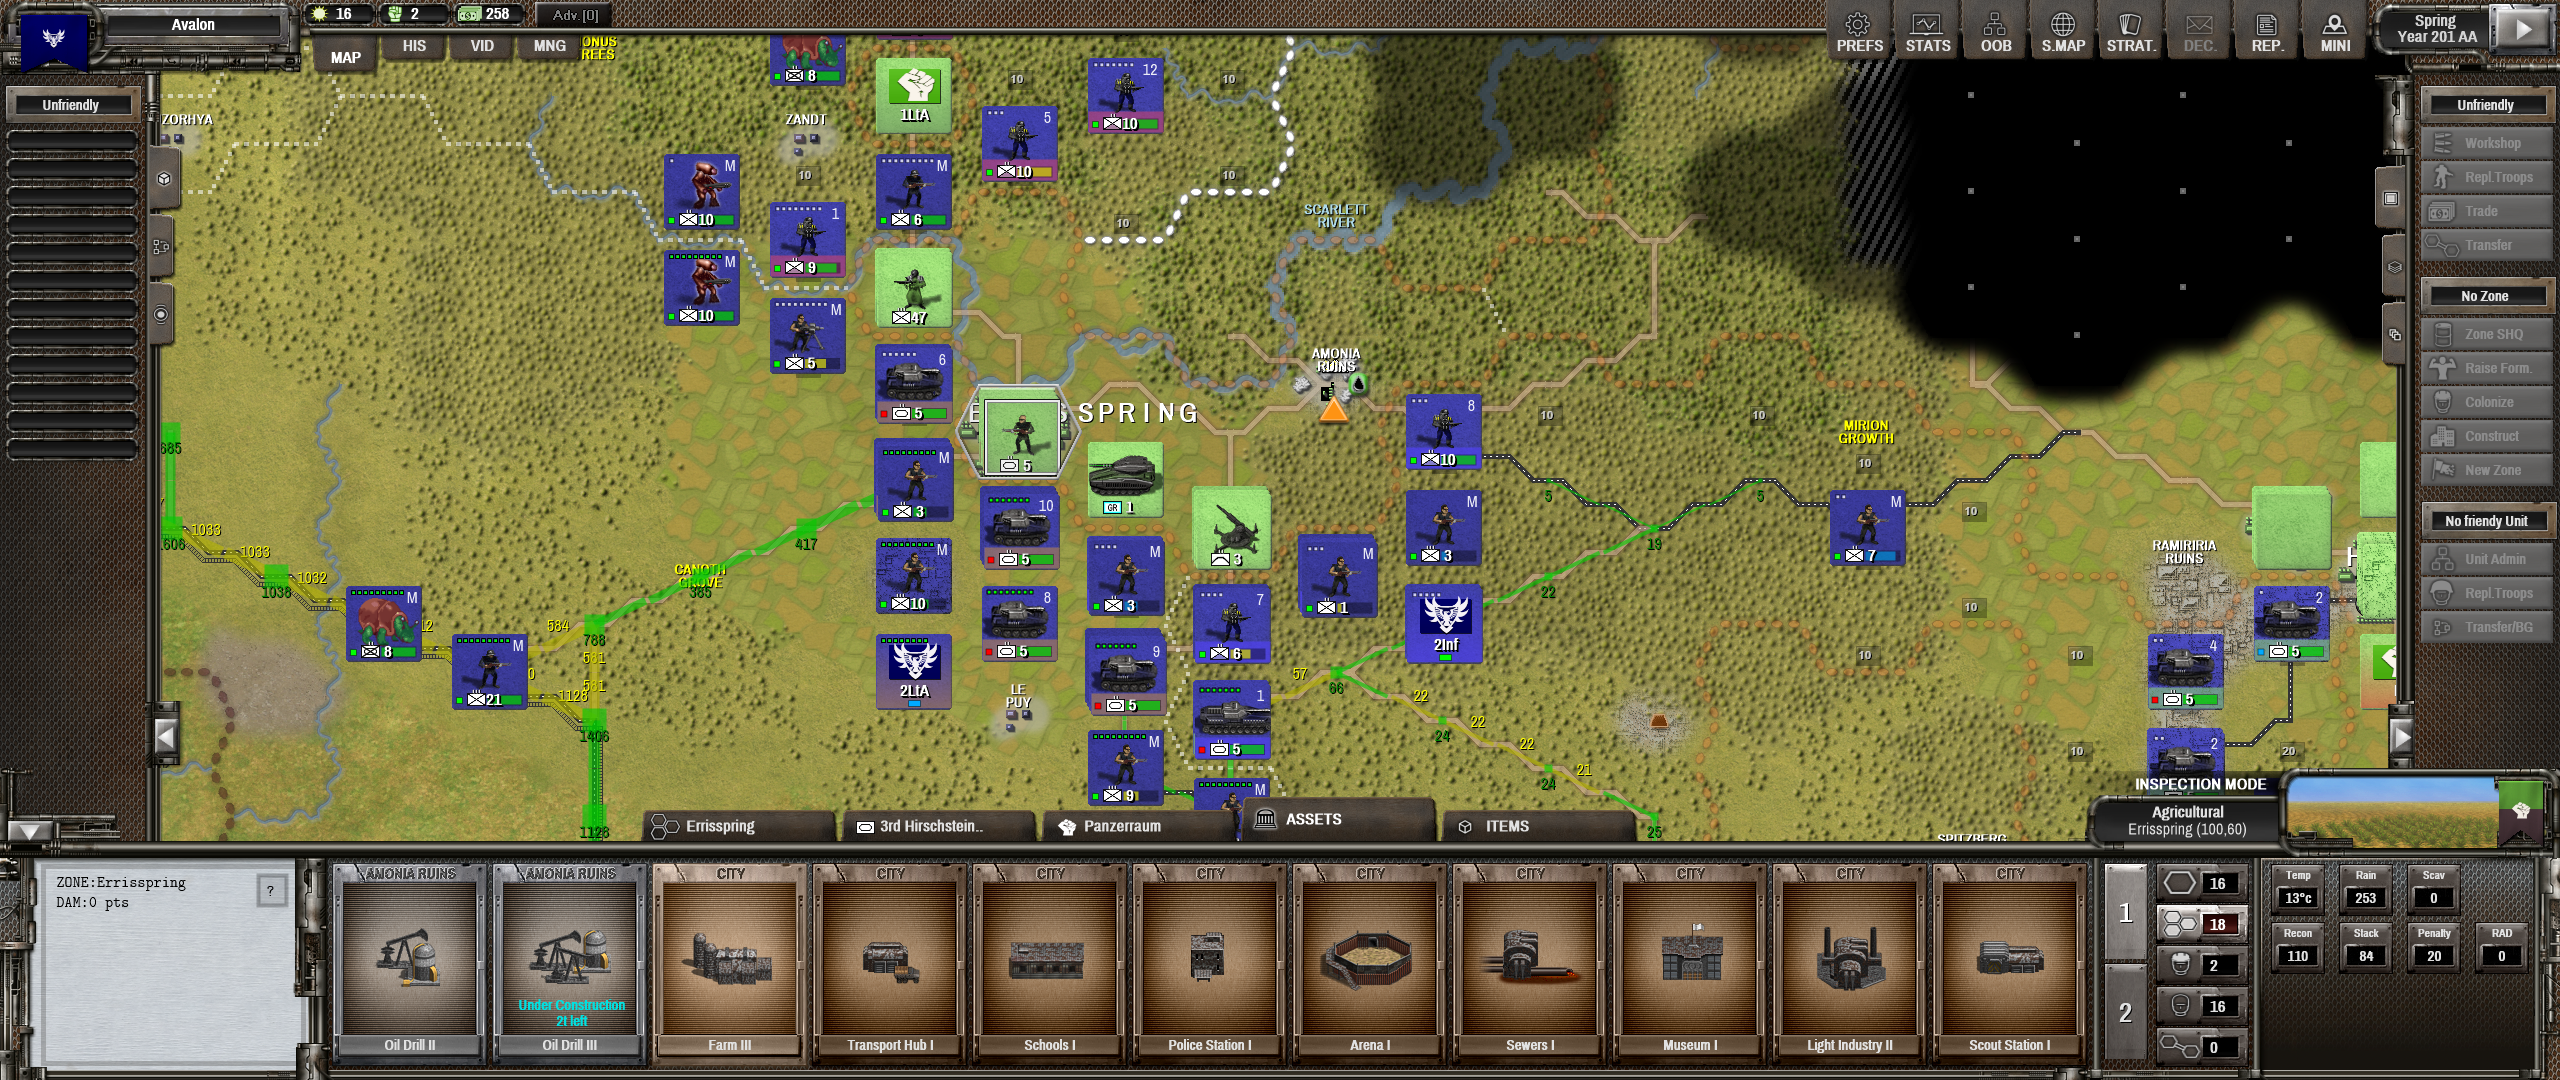
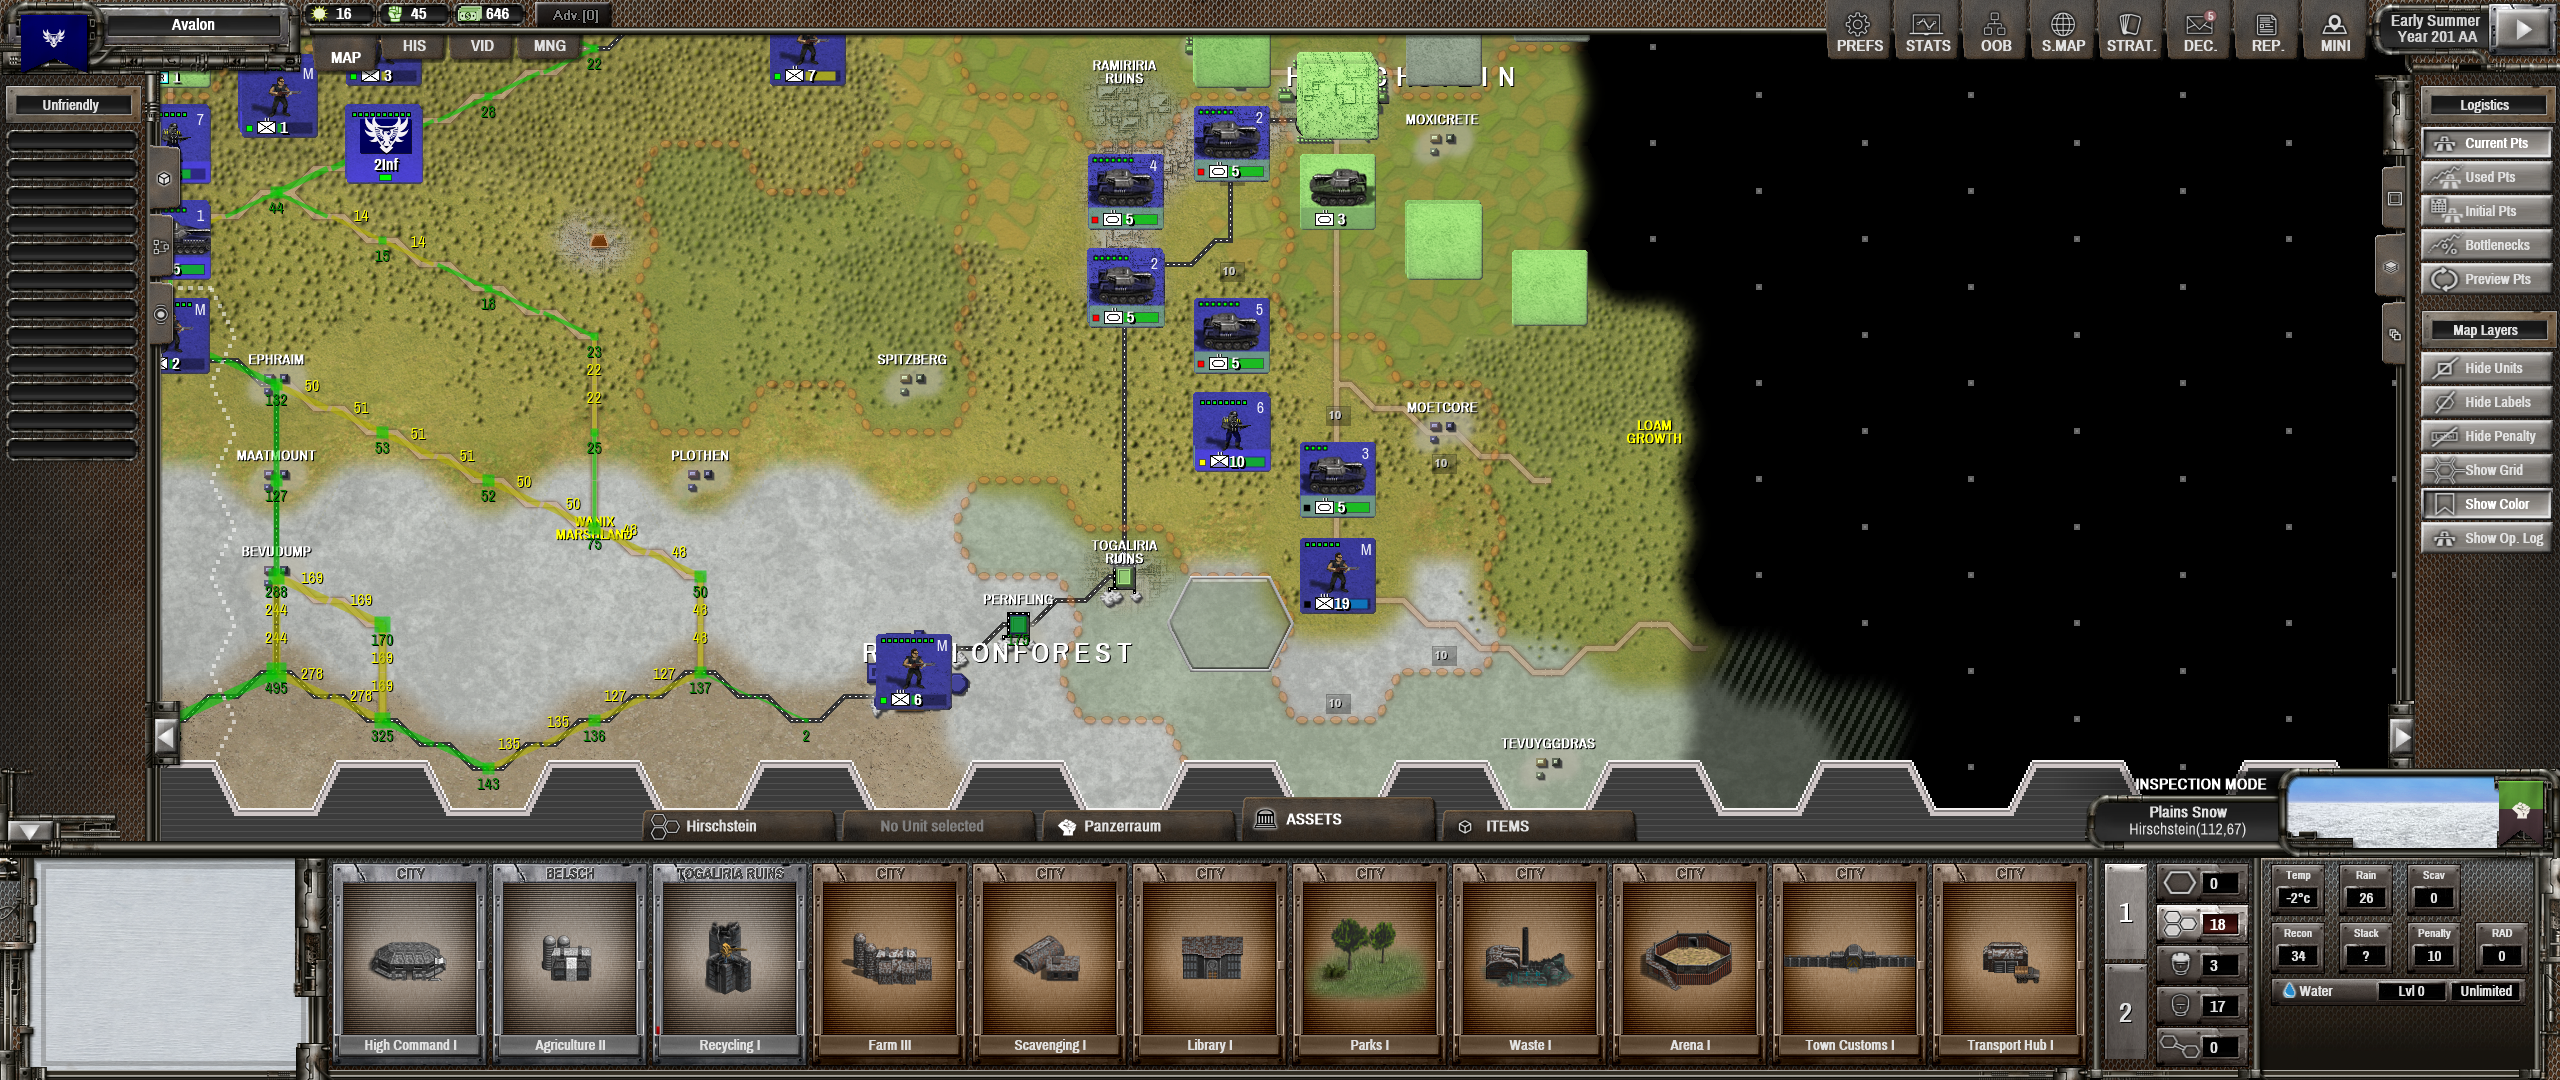
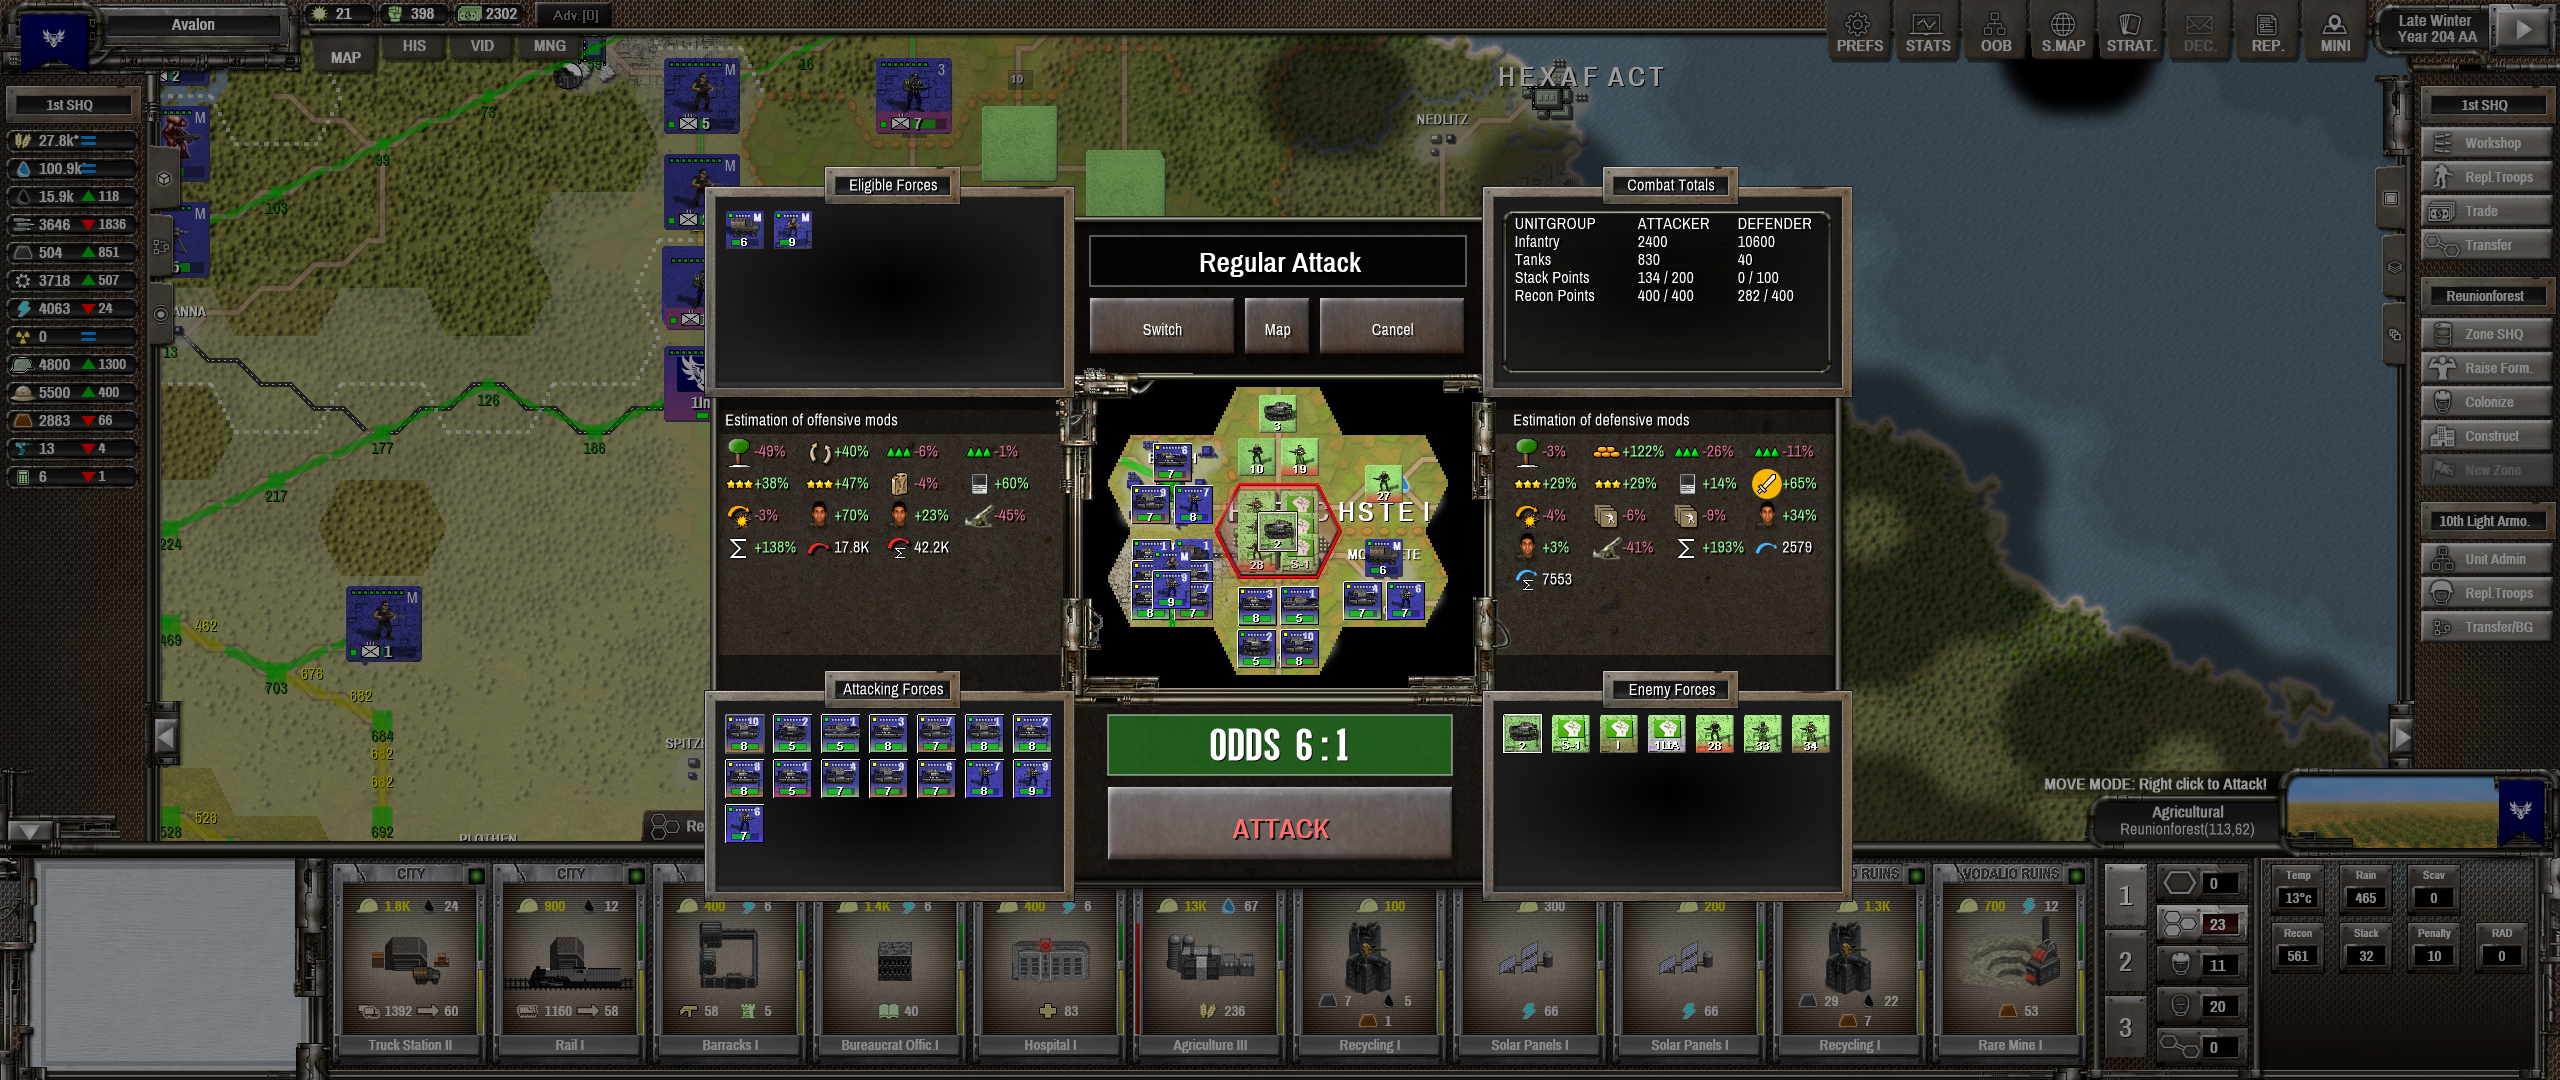
To the east, the Companions follow the road northeast and discover the Panzerraum capital, Hirschstein. The possibility of a knock-out blow is irresistible.
SETBACK!
Editorial: Dangers of overconfidence?
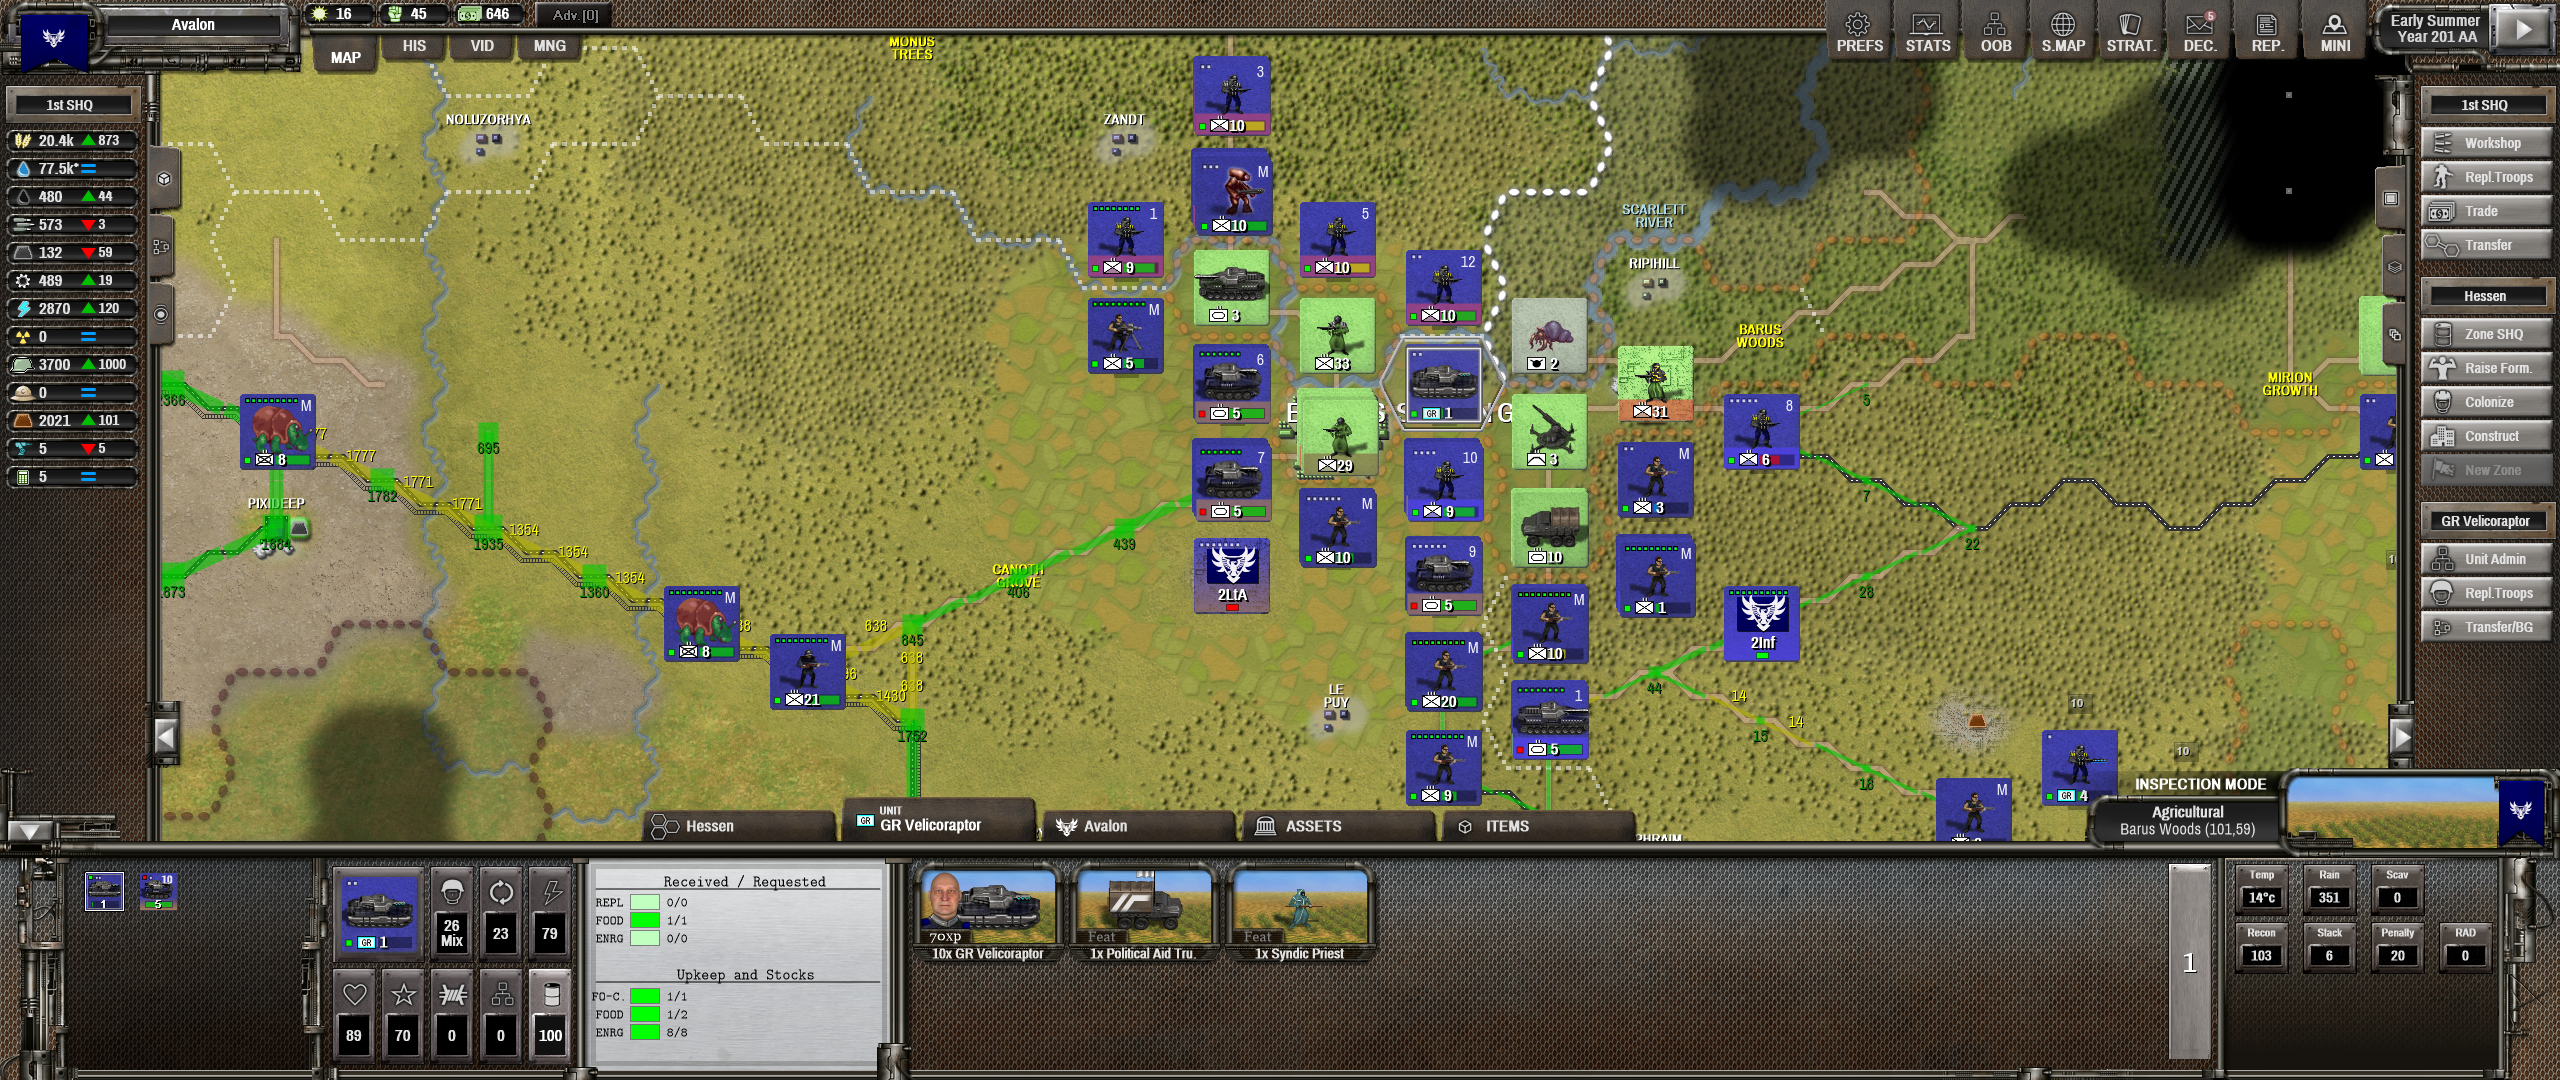
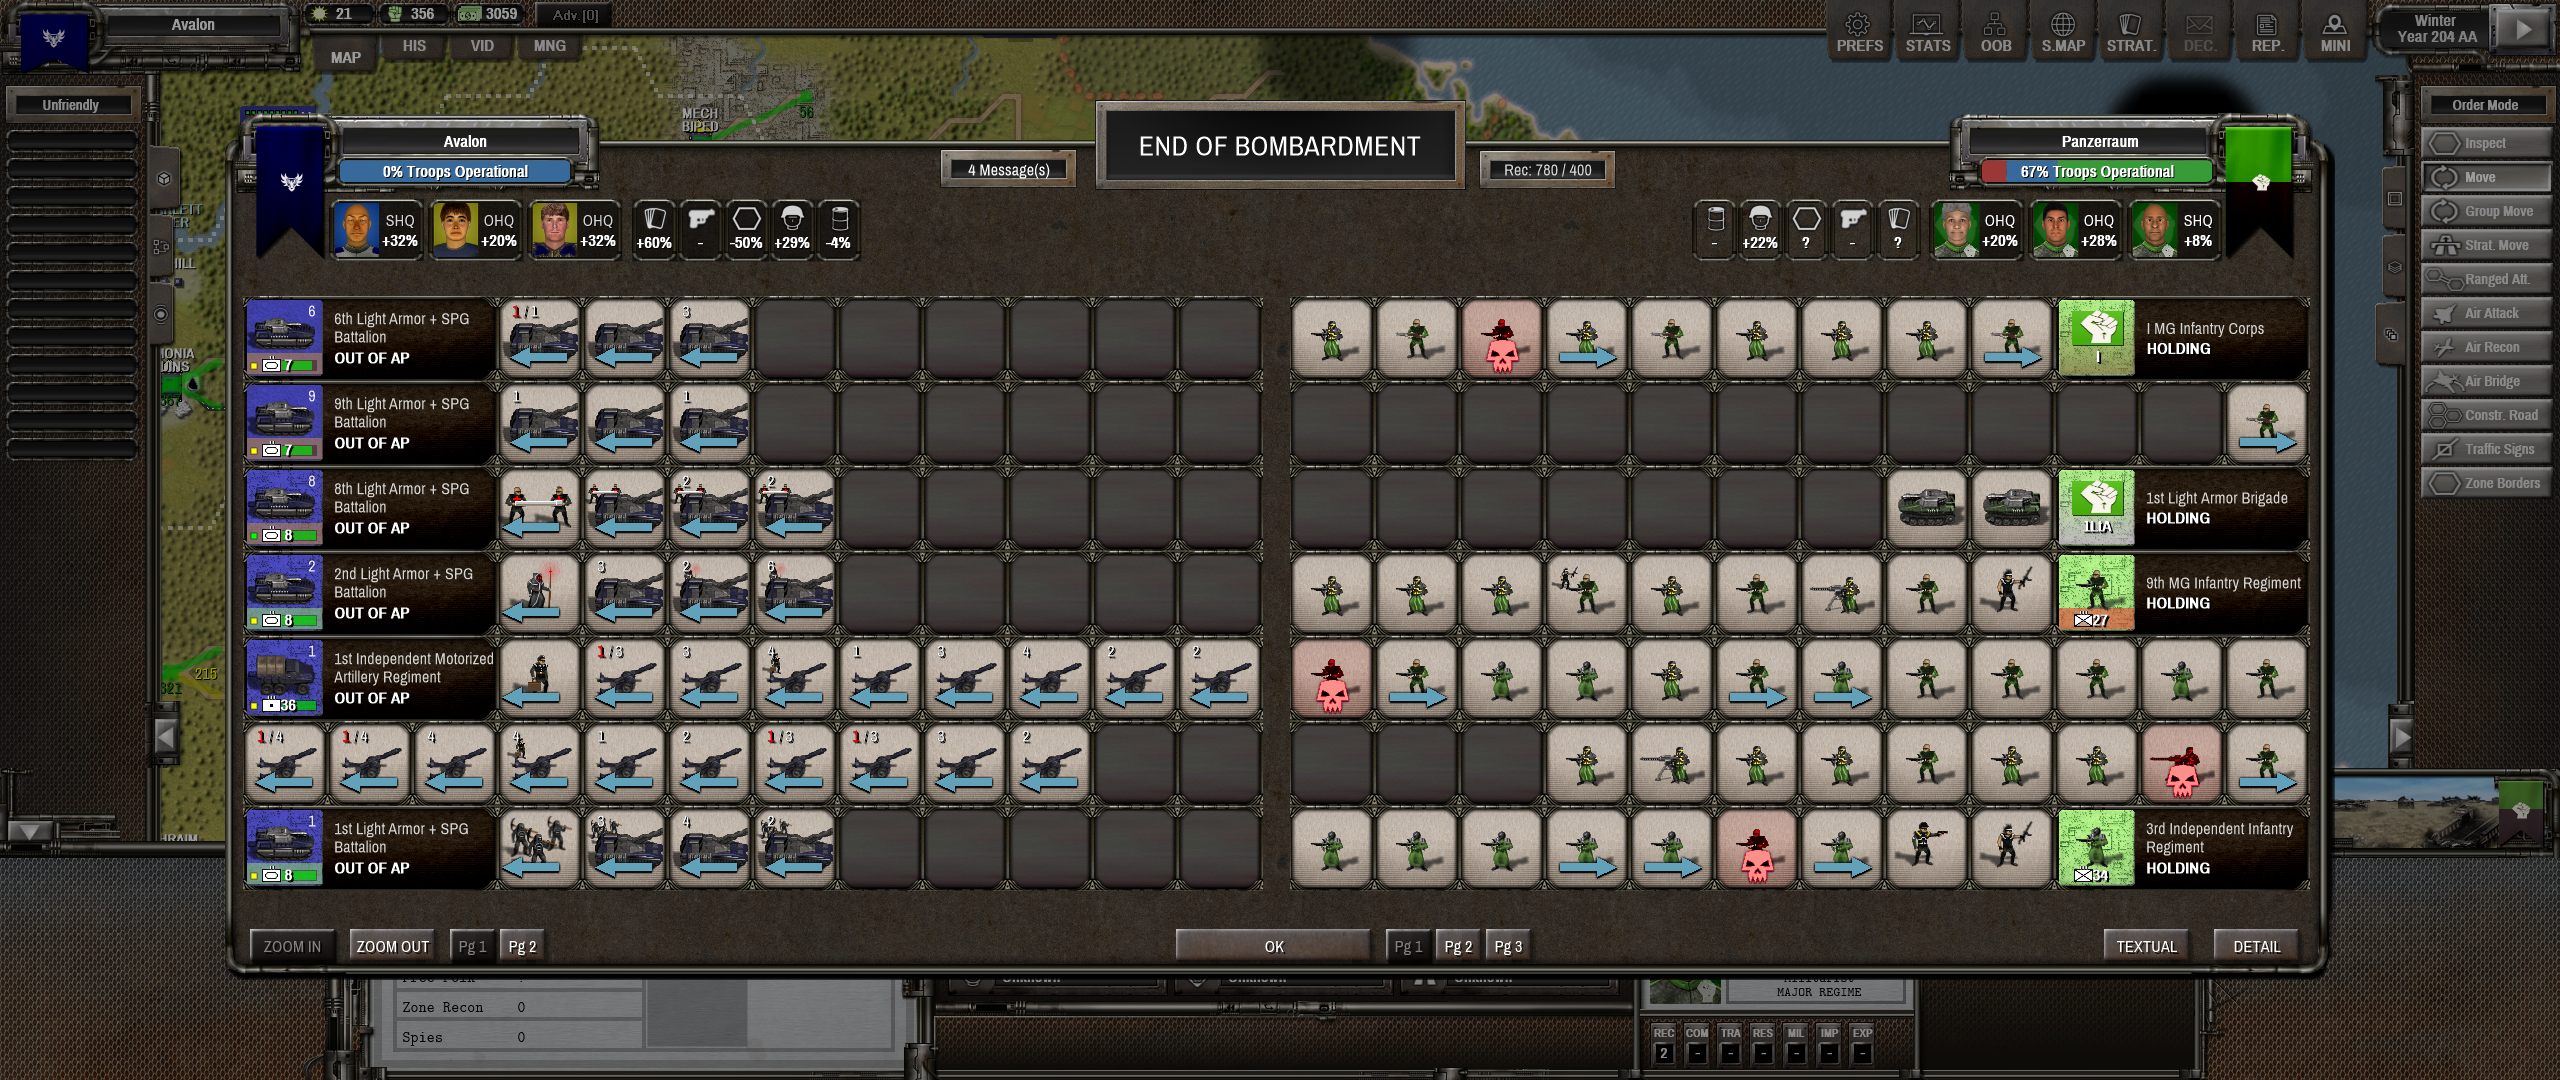
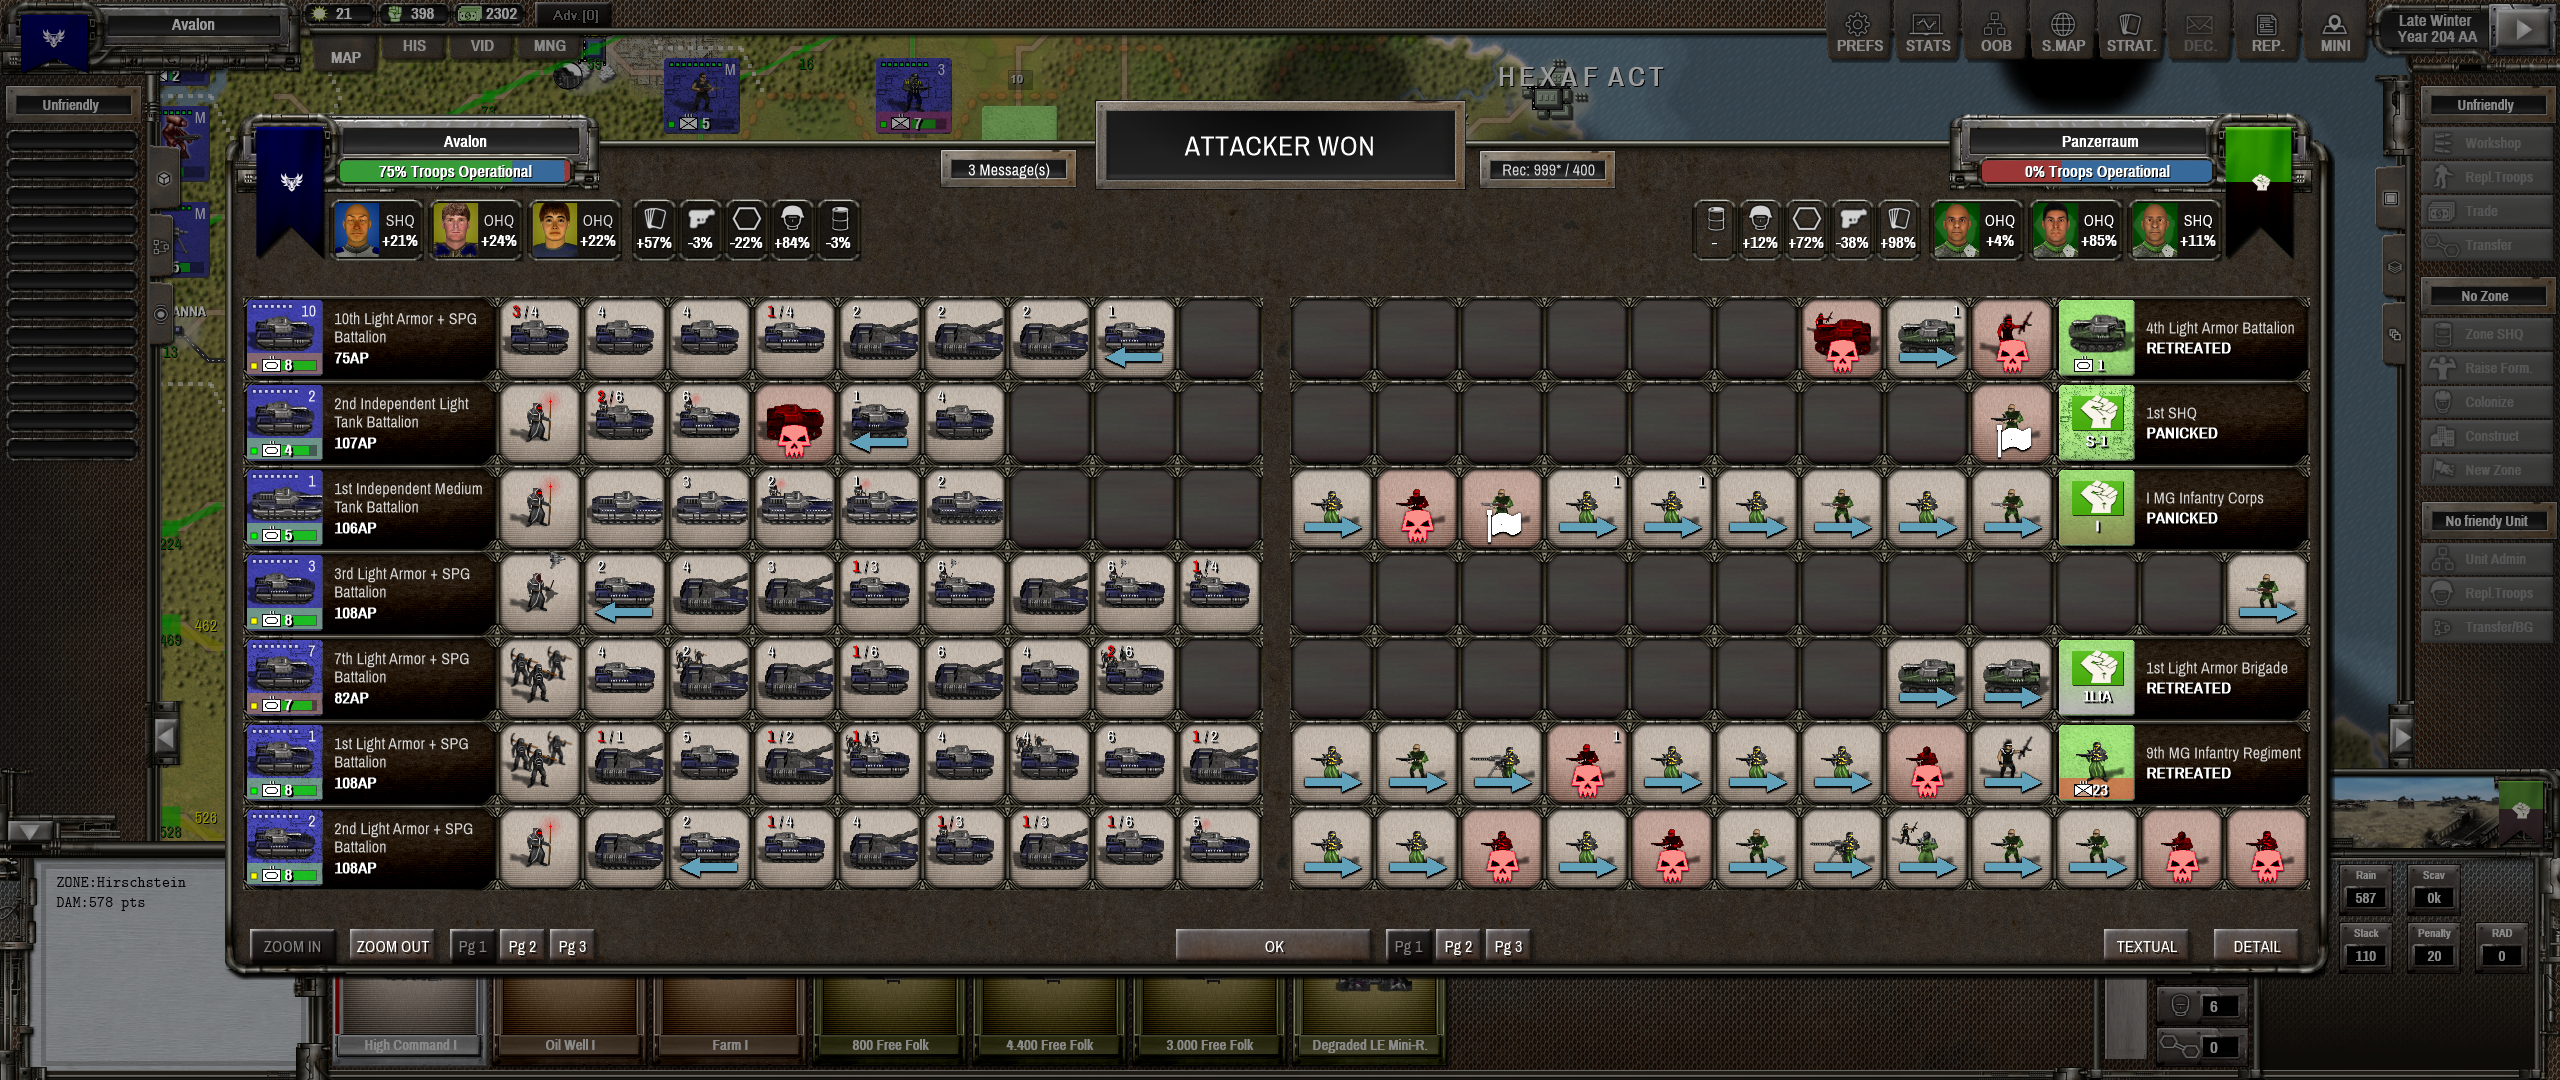
I send the Companions forward. They reach the suburbs of Hirschstein, but the defenders hold. And this time, massed tank battalions emerge on my flank, poised to cut off my spearhead. As the enemy tanks advance, I retreat to safety:
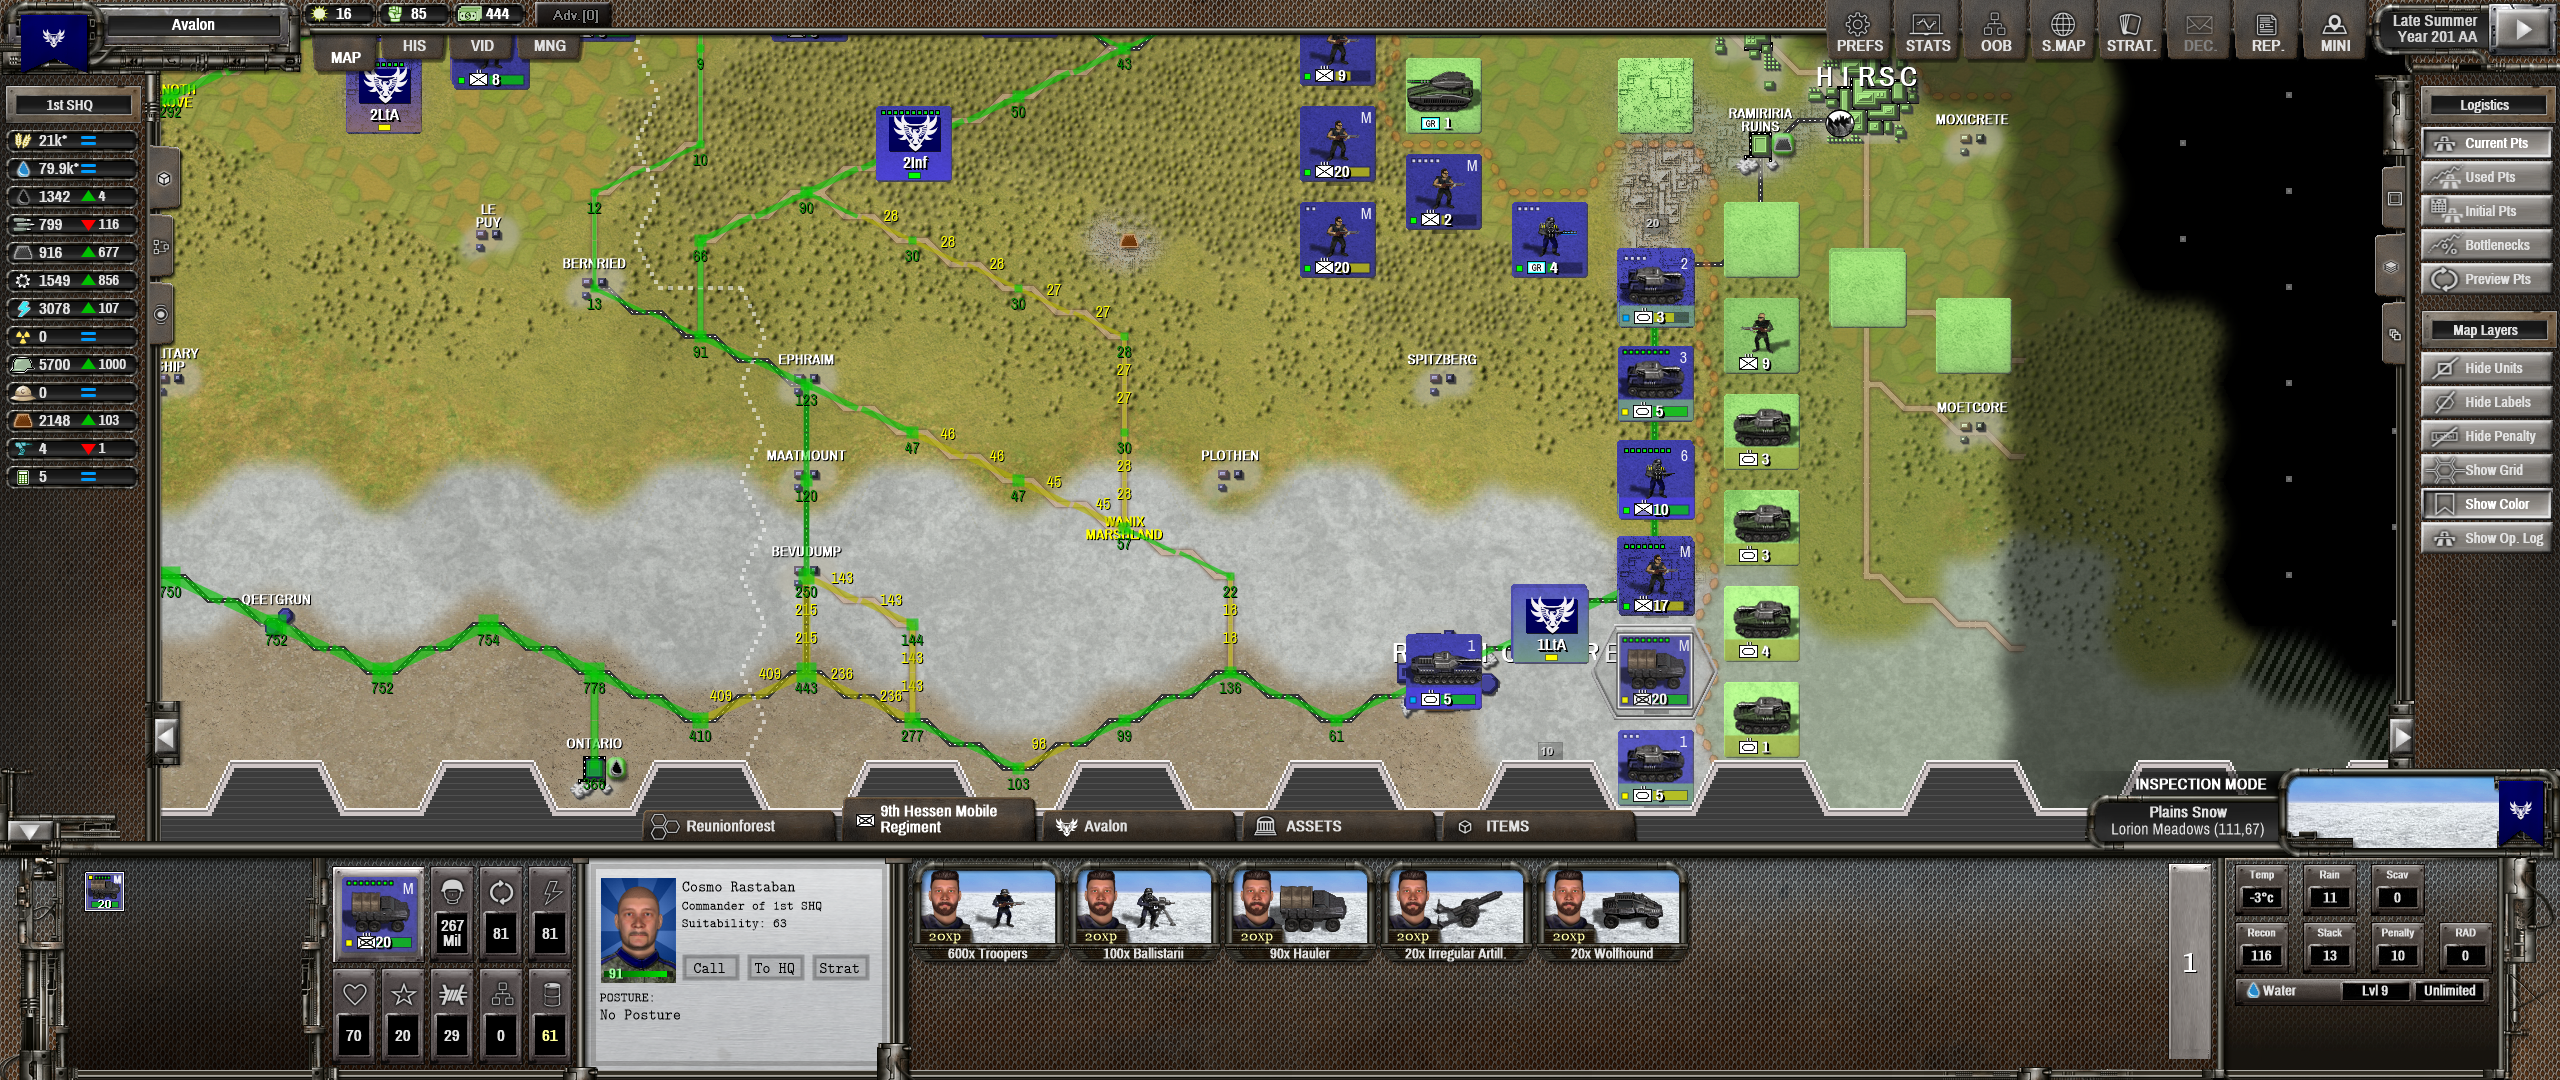
This is how the Panzerraum AI should have fought from day one — machine against machine, and manoeuvre against manoeuvre. (Possibly it didn’t have the resources at the time — armoured brigades are not cheap. Or possibly it was distracted by a multi-front war — besides me, Panzerraum is at war with at least one minor faction.) And current circumstances — a much shorter front — favour the AI’s use of fewer, larger units, making it harder for me to punch through overstretched lines.
With the possibility of a coup de main gone, I settle in for a war of attrition. I look for opportunities to encircle and pick off a regiment here, or whittle down a tank battalion there. The AI returns the favour, with occasional bloody pushes.

And so the war drags on.
ISLAND GETAWAY!
Visit Avalon’s newest member city
While the war rages, life goes on across the rest of the planet.
I invest in infrastructure — with my armies far from home, I pour metal and industrial production into building railways from my capital, Albion, to nearer the front.
Across the western sea, I diplo-annex the island city-state of Belhors:
- First, another city is always welcome.
- Second, I can use this to practice the newly added maritime logistics in the Oceania expansion. I pay for a rather expensive shipping contract, allowing me to send materials back and forth. The idea is to get resource production off the ground in Belhors, so it becomes self-sustaining.
- And third, Belhors is just across a narrow strait from Polyshelf — the empire that extorted me back in Part 1. If the time comes for payback, their territory will be useful.
I also pay for reconnaissance of the ocean — and the surrounding shores — north of my continent. Across the ocean, at least two empires are fighting a war of their own:
Finally, I meet another major empire nearby, the theocracy of Monterra. Located northeast of Panzerraum, Monterra is tenuously connected to the rest of the continent by a narrow isthmus. For the moment, we have no border in common.
Like Panzerraum, Monterra instantly takes a dislike to me. Random event pop-ups give me the chance to support the peace party within their government. So far, this hasn’t paid off — I suspect I will have to fight them eventually.
INVENTOR DEMONSTRATES FLYING MACHINE!
General Staff sends observers
Instead of the brute-force approach — raising more brigades — I decide to try other approaches against Panzerraum.
I begin fielding my first aircraft — the Merlin light helicopters:
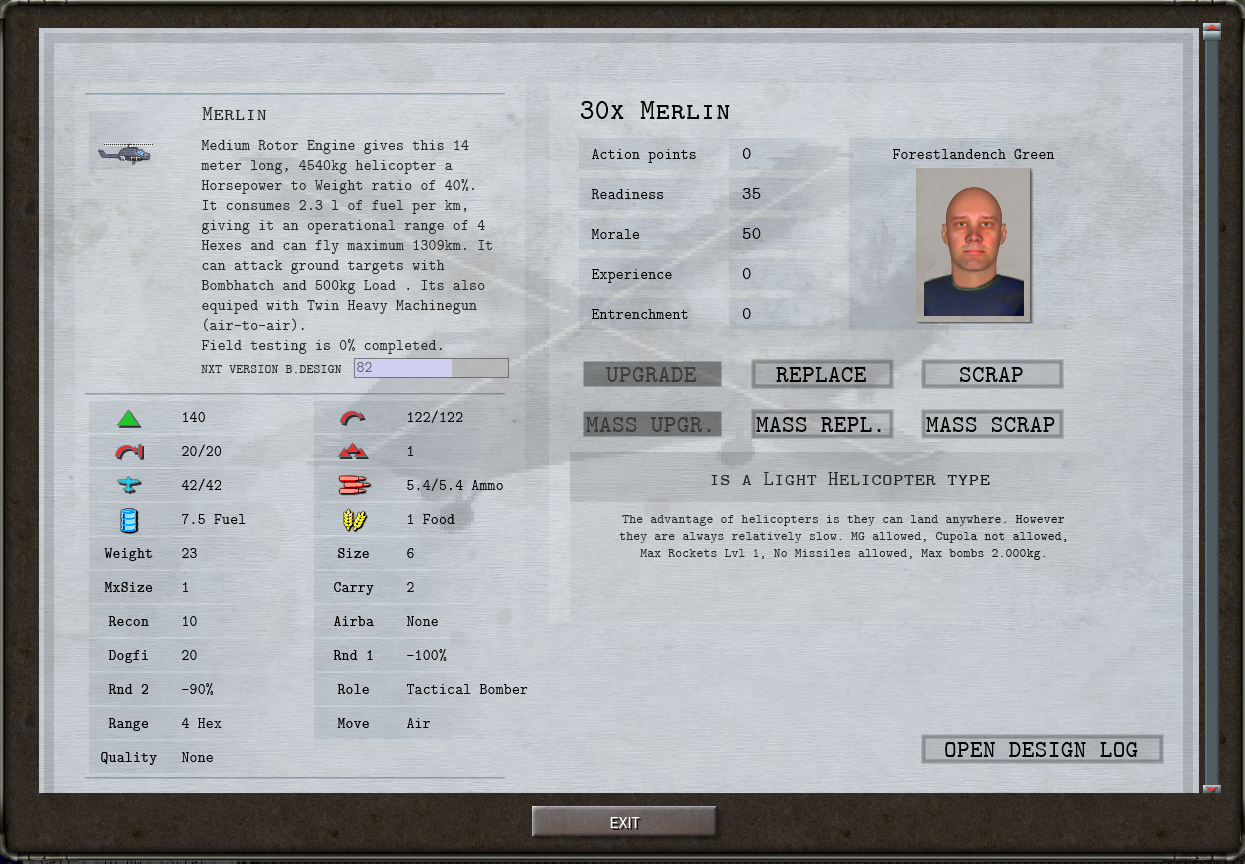
Unfortunately, the Merlin underwhelms in practice. I suspect the issue is size — it’s too small to carry a meaningful bomb load.
Now that the war has become more static, I start fielding artillery. Taking advantage of custom military formations — a feature that wasn’t in the game at launch, and which I’d never tried before — I modify my standard light tank brigades, the Companions and the Sarmatians, to add self-propelled artillery.
The big guns devour ammunition, but gradually whittle down the enemy:
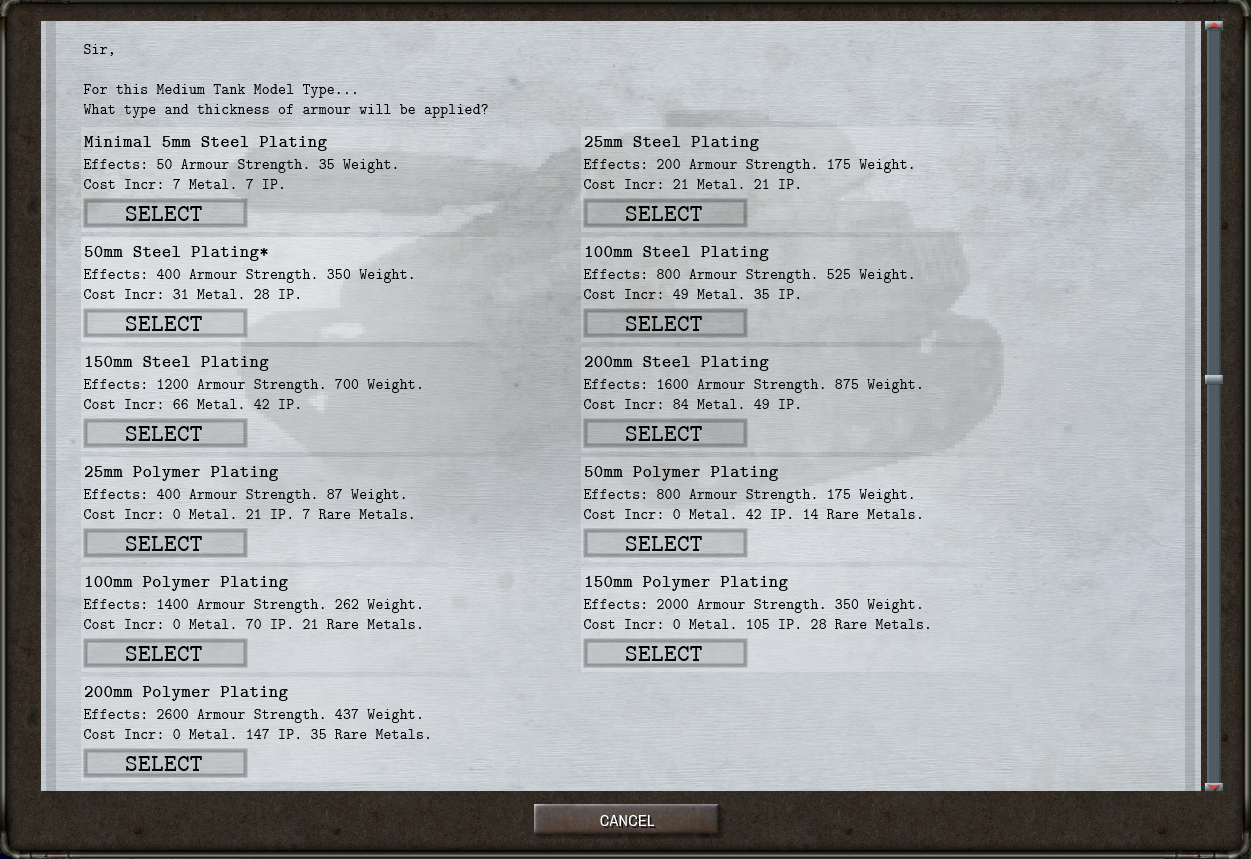
And I hit the military technology jackpot with the introduction of polymer armour. This is a step-change — for a given weight, it is far, far stronger.
In this example, I upgraded my “Cai” medium tanks from 50mm of steel armour to 100mm of polymer armour. The polymer armour had 3.5x the strength and still weighed less:
AMMUNITION PRODUCTION RAMPS UP!
Big push imminent?
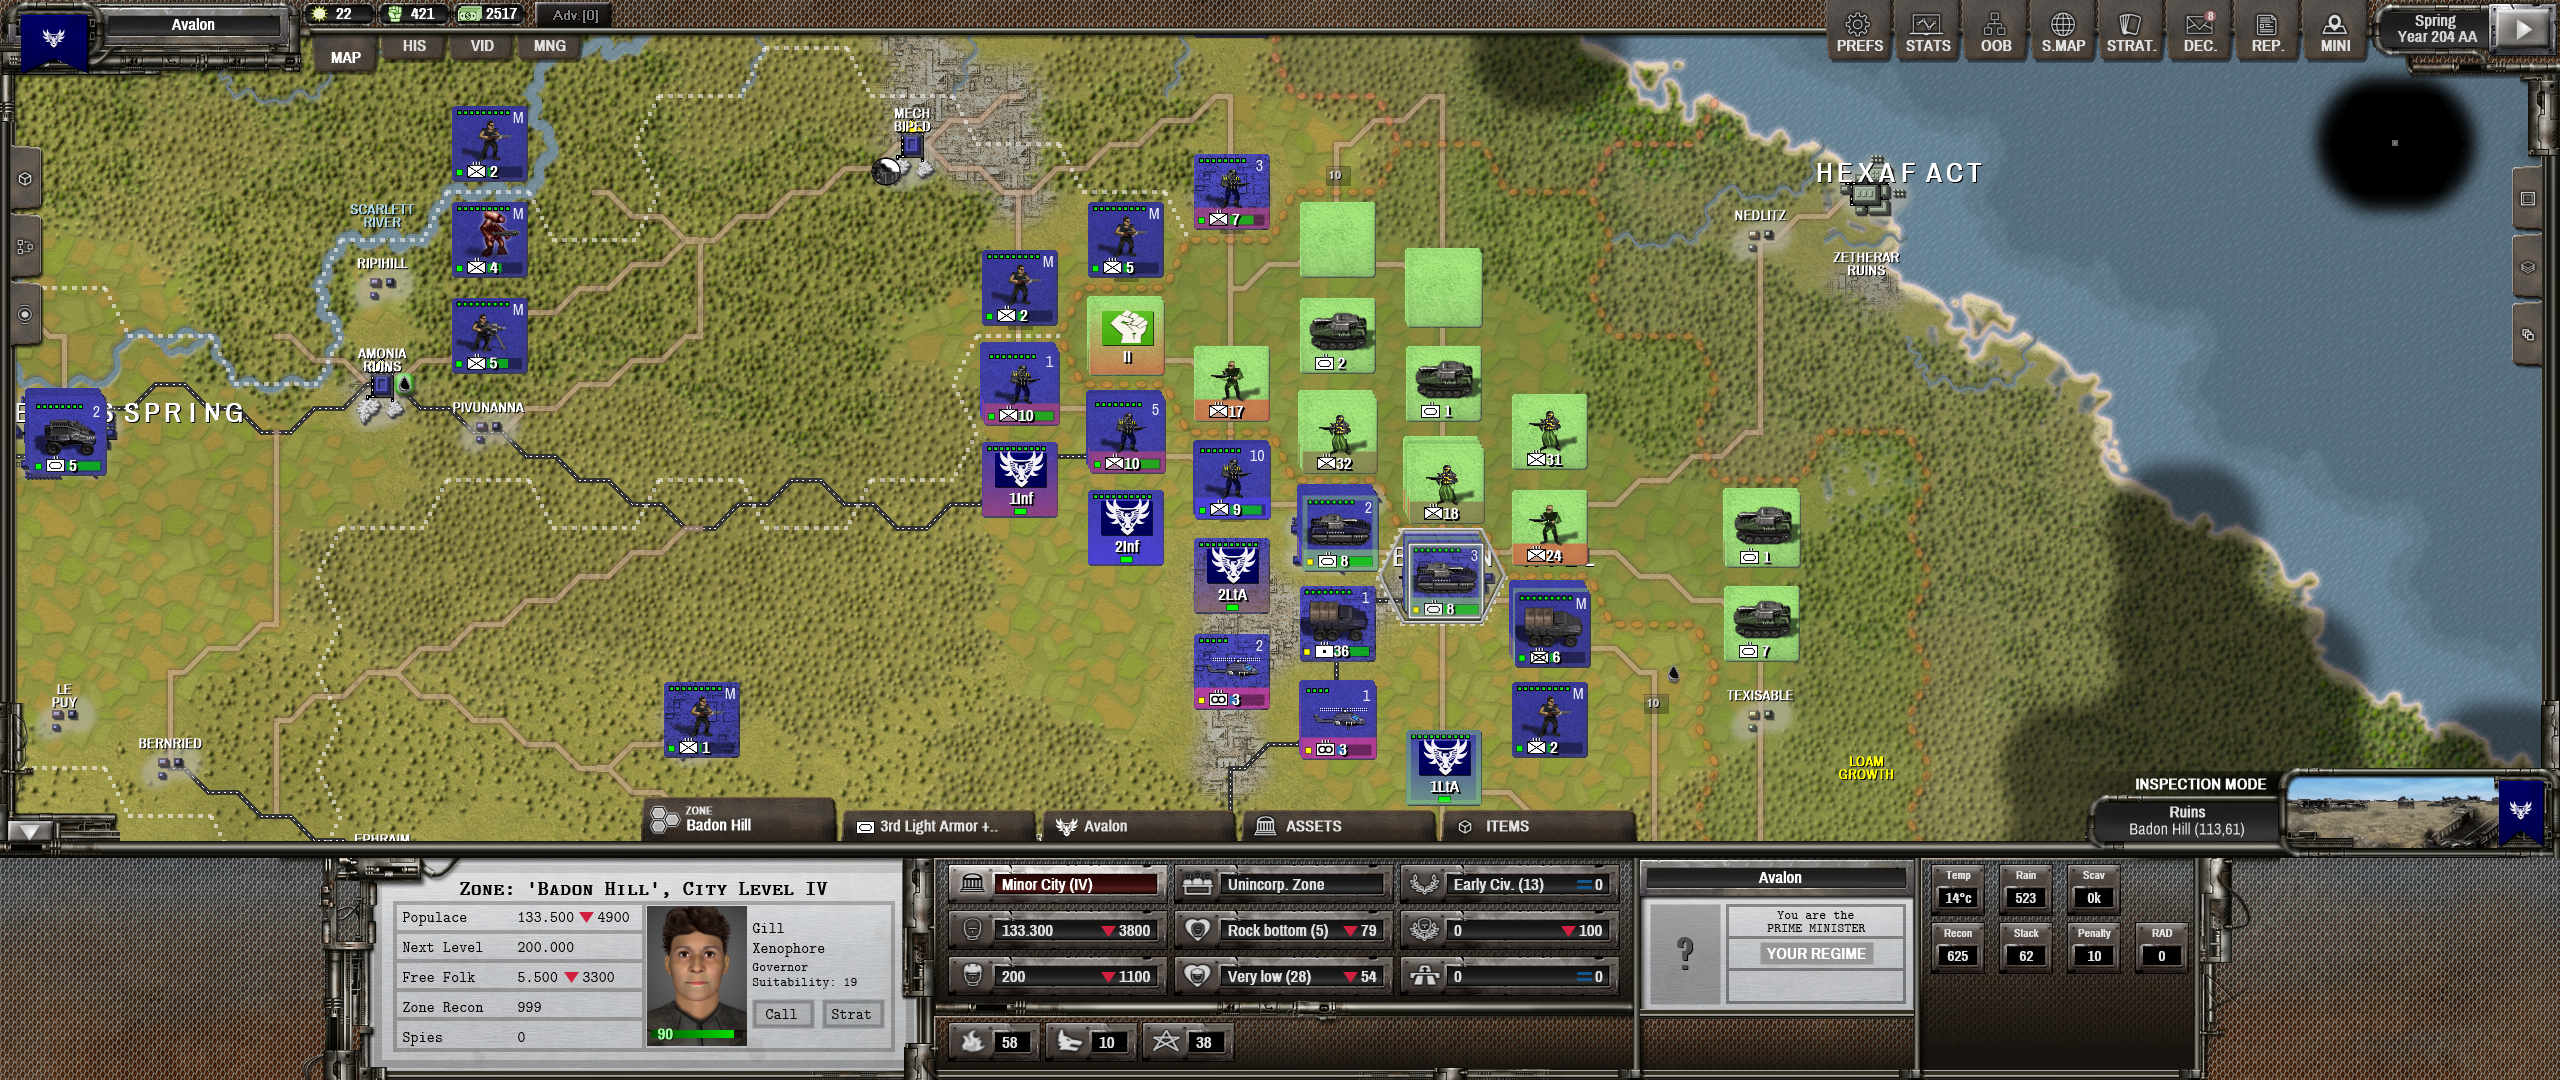
Turn after turn, the artillery fires. Turn after turn, the little Merlins sortie. And turn after turn, my army creeps closer to Hirschstein, Panzerraum’s last city.
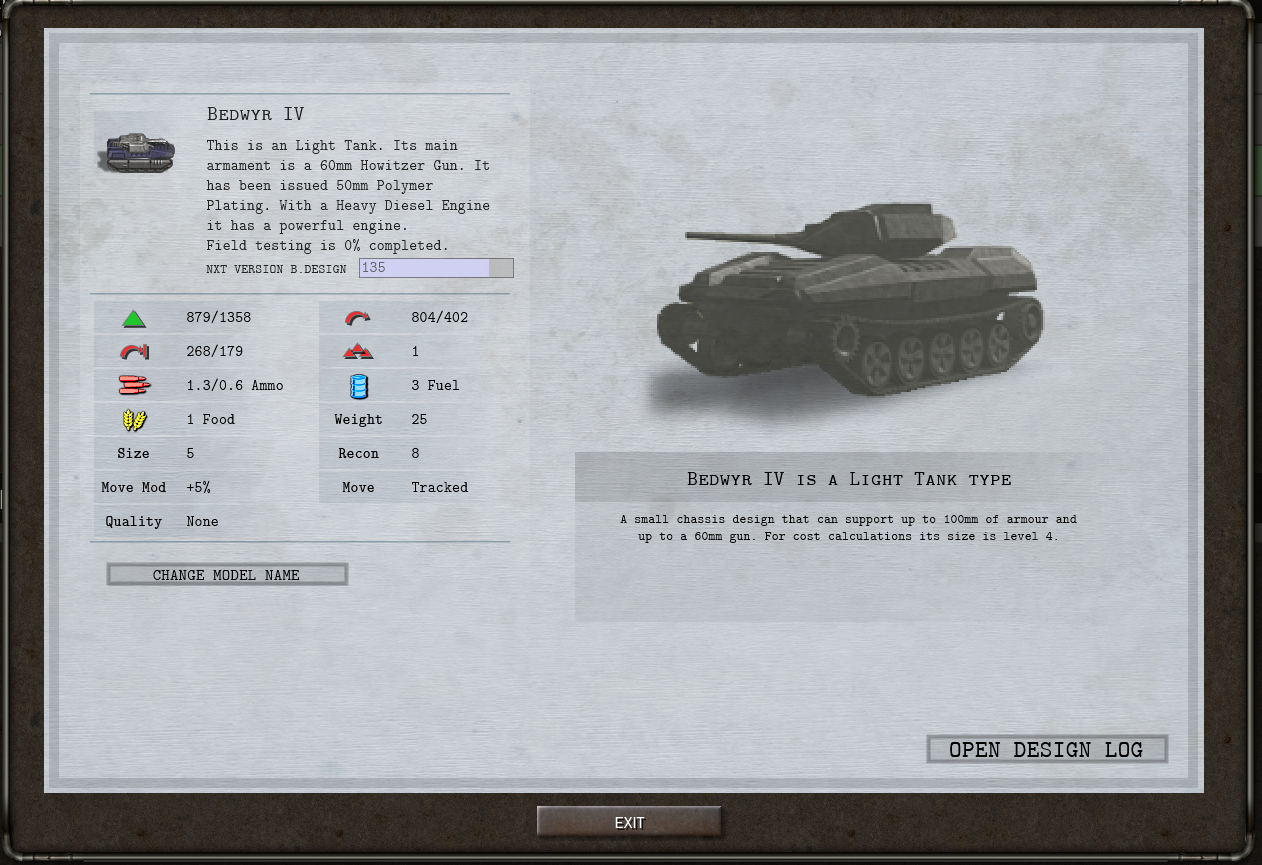
A new Bedwyr model arrives just in time:
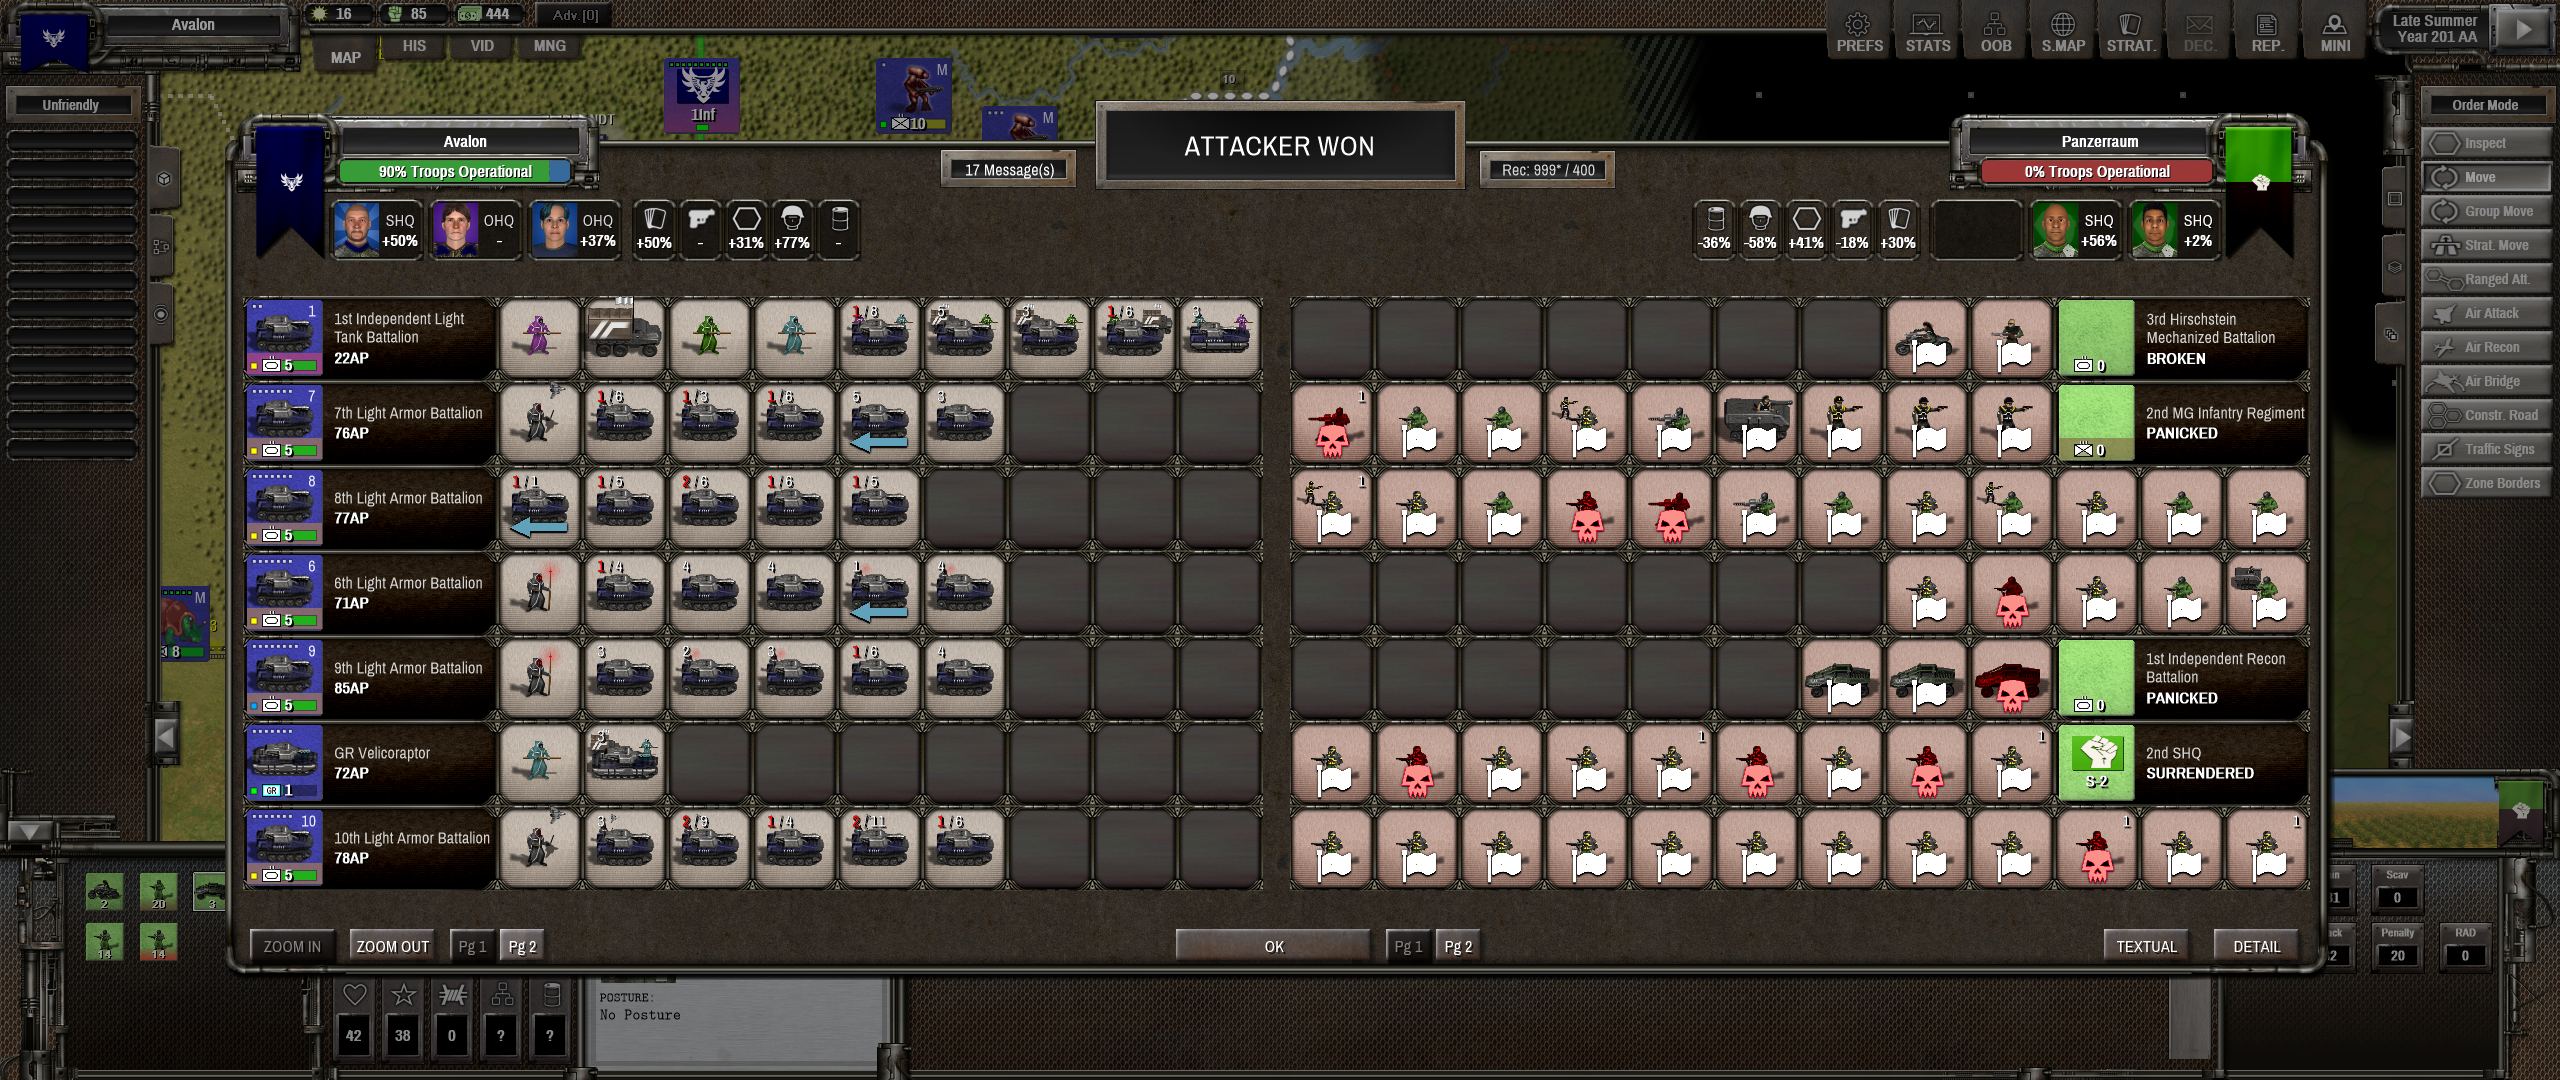
When it comes, the final push into Hirschstein is an anticlimax.
The exhausted defenders give way:
Fighting has devastated the city — there are zero upgrades left standing. No truck depots, no farms, no government offices, no private-sector amenities, nothing. I’ll need to invest in infrastructure as a priority.
I give the ruined city a new name:

With this, the war against Panzerraum is effectively won. A large Panzerraum army remains in the field, but without a city to provide supplies, I expect them to wither away.
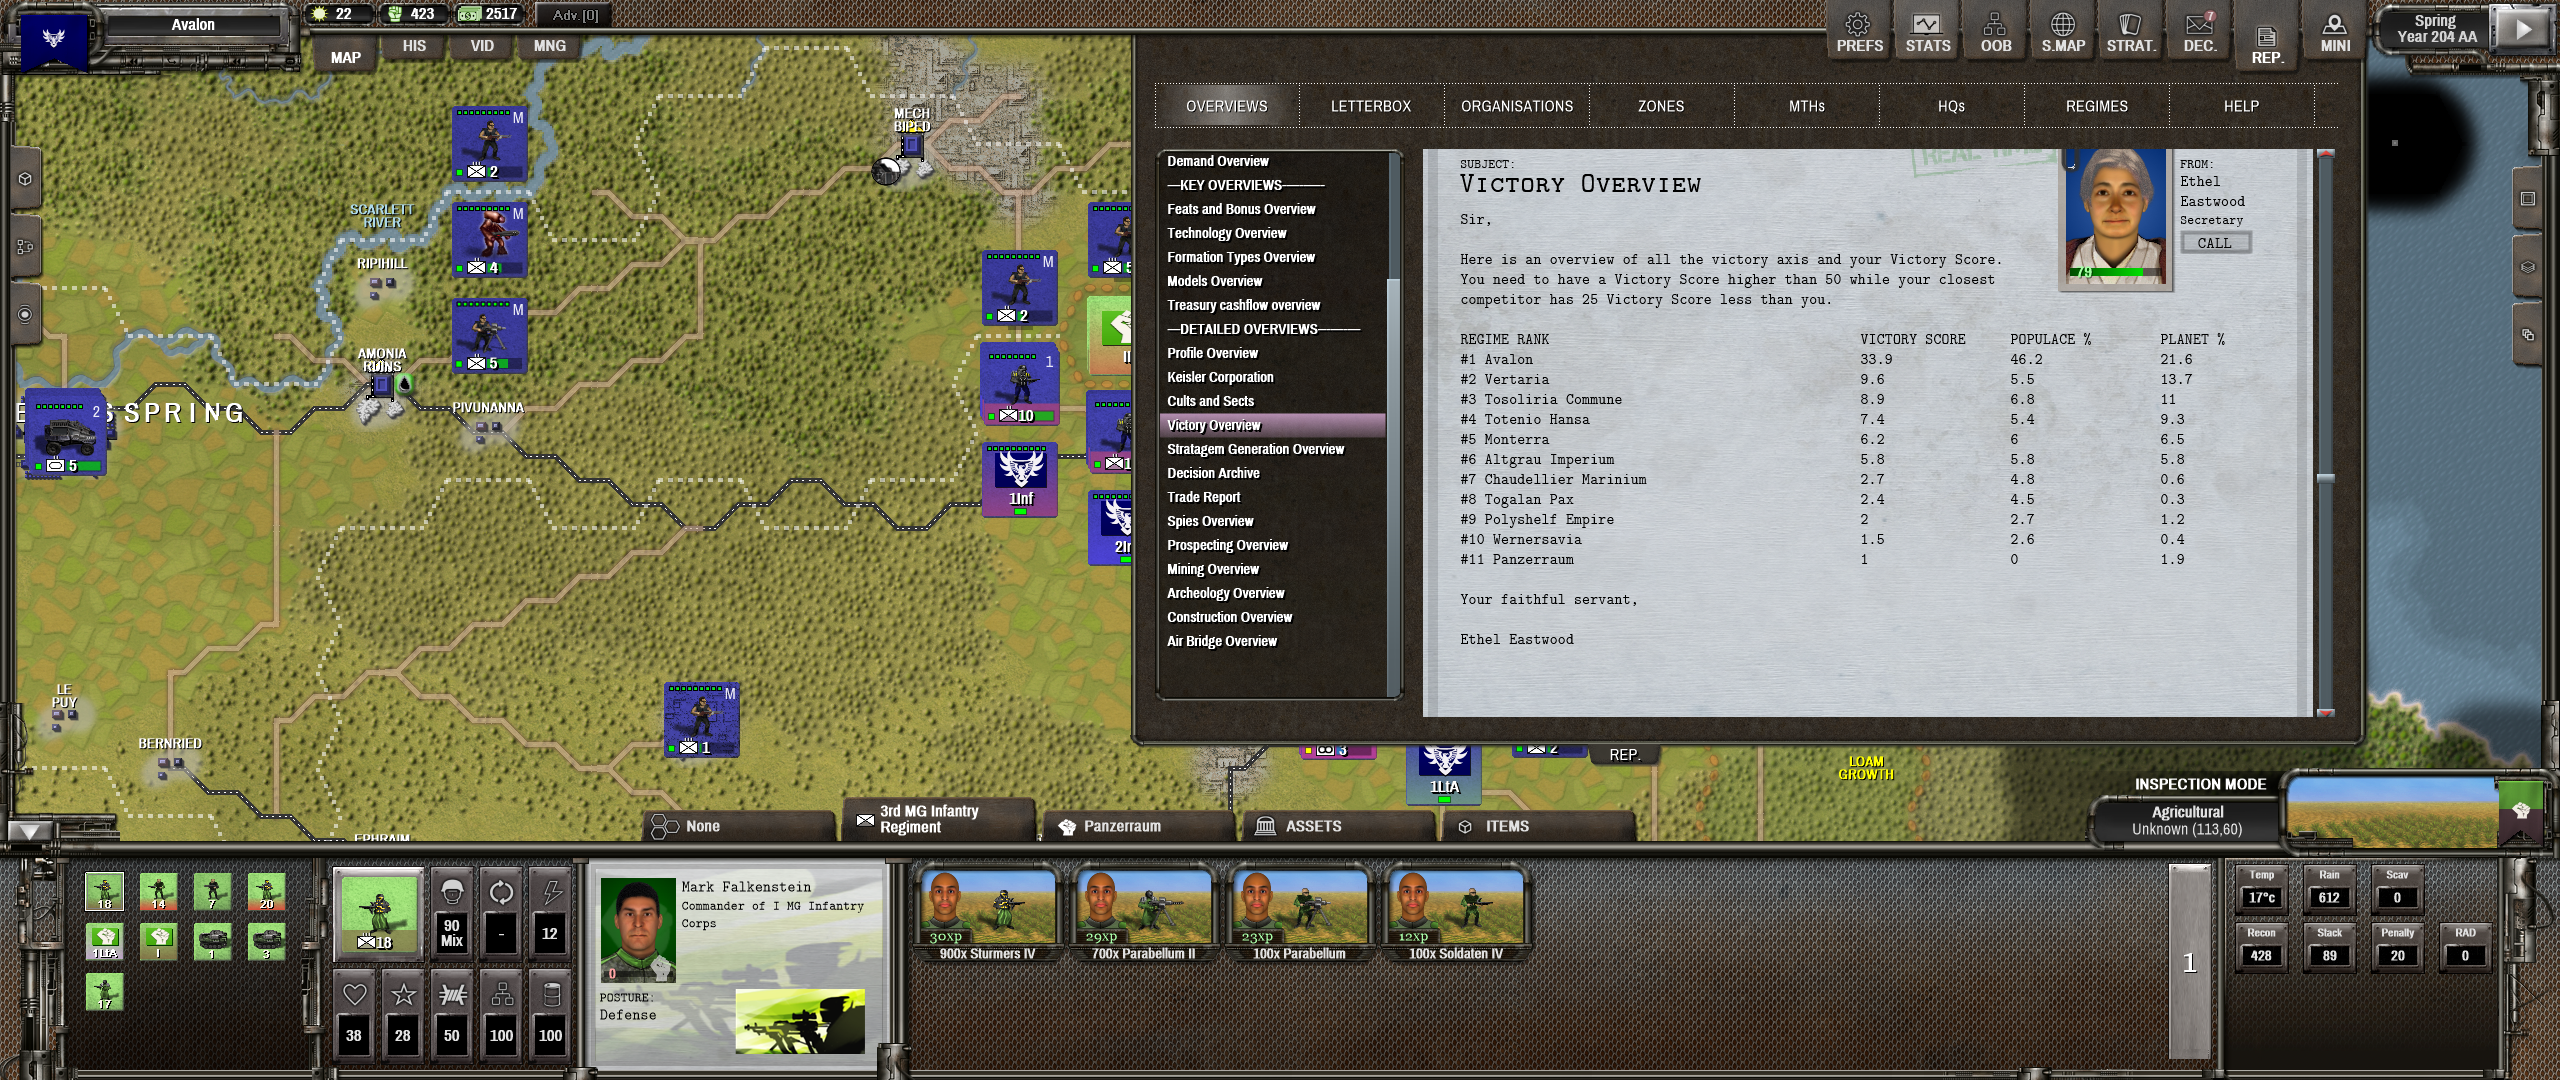
Here is the victory tally. I remain well in front:
After this, my priority will be to consolidate. I want to upgrade my production buildings at home, while rebuilding and integrating the new territories. The question is whether events will get in the way.
Discover more from Matchsticks for my Eyes
Subscribe to get the latest posts sent to your email.