- Shogun 2 impressions: THIS is a difficulty spike
- Total War? Only for the undiplomatic: the lessons of Shogun 2
- Total War: Shogun 2 – The Verdict
- Ninja FAIL
- Postcards from Sengoku Japan: The Mori’s Last Stand
- Shogun 2: Fall of the Samurai first impressions
- Matchlocks for my Eyes, or Total War: Shogun 2: Fall of the Samurai – The Verdict
- Let’s reunify Japan in Total War: Shogun 2! Part 1: Awakening the Tiger
- Let’s reunify Japan in Total War: Shogun 2! Part 2: Patience and Preparation
- Let’s reunify Japan in Total War: Shogun 2! Part 3 (Final): Ride Forth Victoriously
Introduction
Hello, and welcome to my Let’s Play of Total War: Shogun 2.
Shogun 2 casts players as a daimyo, one of the regional warlords of sixteenth-century Japan. The ultimate goal is to march on Kyoto, at the centre of the map, and enthrone oneself as shogun. Along the way, the player must manage a realm, raise armies, and command them in battle. The game triumphs on every level — as an exercise in strategic decision-making; as an epic come to life; and as an aesthetic treat. It is my favourite strategy game of all time.
For this run, I have opted to play as the Takeda clan, led by one of the most renowned warlords of the period — Takeda Shingen. This is, in fact, my second Takeda attempt — I abandoned the first after painting myself into a corner. I turn the game’s difficulty up to “Hard”, which affects both the strategic map and the tactical battles. My intent is to turn down the battles to “Normal” — the computer cheats on higher battle difficulties. Instead, I forget. As a result, the game so far has been entirely played on Hard.
I’ve chosen the Takeda for two reasons. First, their location in central Japan will make for a nice change — I won my last Shogun 2 campaign (using the Fall of the Samurai expansion pack) as an outlying island clan. Second, I’ve been meaning to make more extensive use of cavalry in Total War games, a job for which the Takeda are well-suited — all their horsemen receive a bonus.
Here is the opening cinematic for the Takeda:
And here is the situation at the beginning of the game:
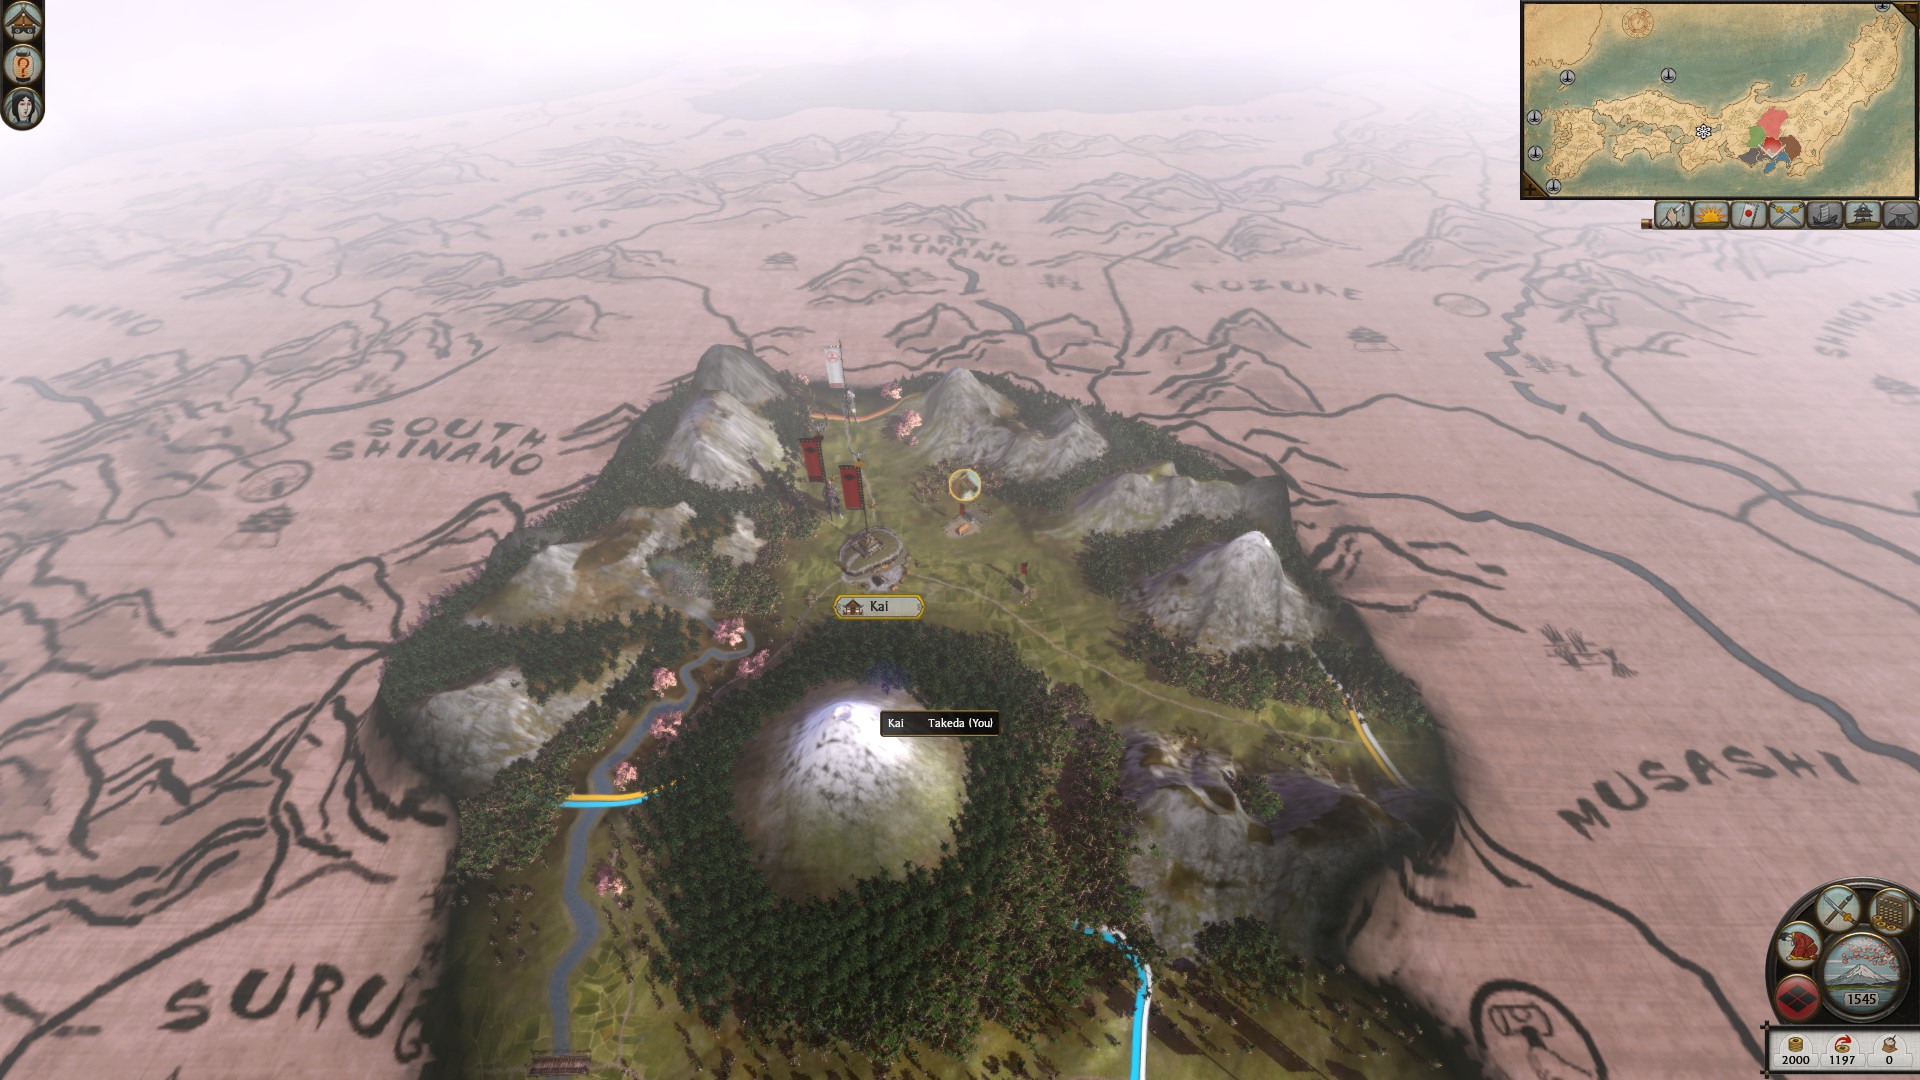 The Takeda start in Kai province, a landlocked mountain pass that runs north/south. All cavalry trained in Kai will receive a bonus, courtesy of the province’s superior horse pastures; this stacks with the innate Takeda bonus to cavalry.
To the north of Kai is North Shinano, also landlocked. It is home to the Murakami clan, who begin at war with me — you can see a small Murakami army near the border. To the south are Musashi province, home to modern-day Tokyo, and Suruga province, home to the allied Imagawa clan.
To win the game, I have to hold 25 provinces, including Kai, Kyoto, North Shinano, and three other provinces all to the north of Shinano. Before then, I must face one of Shogun 2’s most distinctive challenges — realm divide. When I draw close to victory, most of the remaining computer players will declare war on me; I’ll need to build my empire around surviving that final difficulty spike.
Laying the Foundations
I begin by squashing the Murakami, my enemies to the north. Their small army offers little resistance, and soon, Takeda Shingen has overrun North Shinano. The way north is now open!
Instead, I halt.
From bitter experience, I know that expanding any further north would be a terrible idea. North Shinano is a crossroads, connected to no fewer than five other provinces (including Kai). That’s five directions from which it can be invaded. Pushing in any one of those directions runs the risk of leaving North Shinano exposed to the others.
So instead, I sit tight. I send out messengers to the neighbouring clans, offering trading rights and military access in exchange for cash:
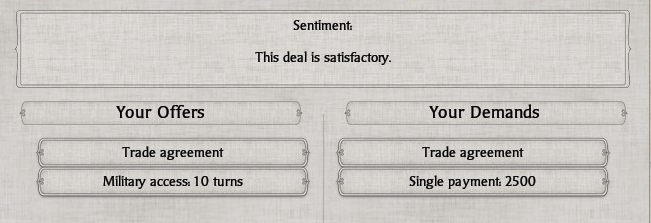 Multiply this several times to imagine how much I raked in. Cash in hand, I invest in farms, markets, roads, and soldiers. For now, the Takeda domain is small; I intend that it should also be prosperous and well-defended.
I avoid recruiting cavalry for now — another lesson from my first game. Instead, I recruit ashigaru, fighting men of common birth. They lack the training and armour of samurai; they are also much cheaper and quicker to recruit. Equipped with a mix of yari (spears) and bows1, they will comprise almost all my army for this part of the LP.
I settle down. I build my strength. I lay my plans: to march south, against the Hojo clan that now holds Musashi. The Hojo provinces are a tempting target: one has a gold mine; another, an expert armourer.
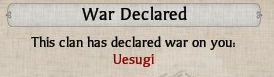
And then, a messenger arrives from Uesugi Kenshin, my neighbour to the north:
Don’t Mess with the Hedgehog
Instead of attacking the Hojo, I hastily ally with them. (Around this time, the game pops up a warning that the Hojo themselves are thinking of invading me; after a few turns, the Hojo think better of it and accept my overtures instead.)
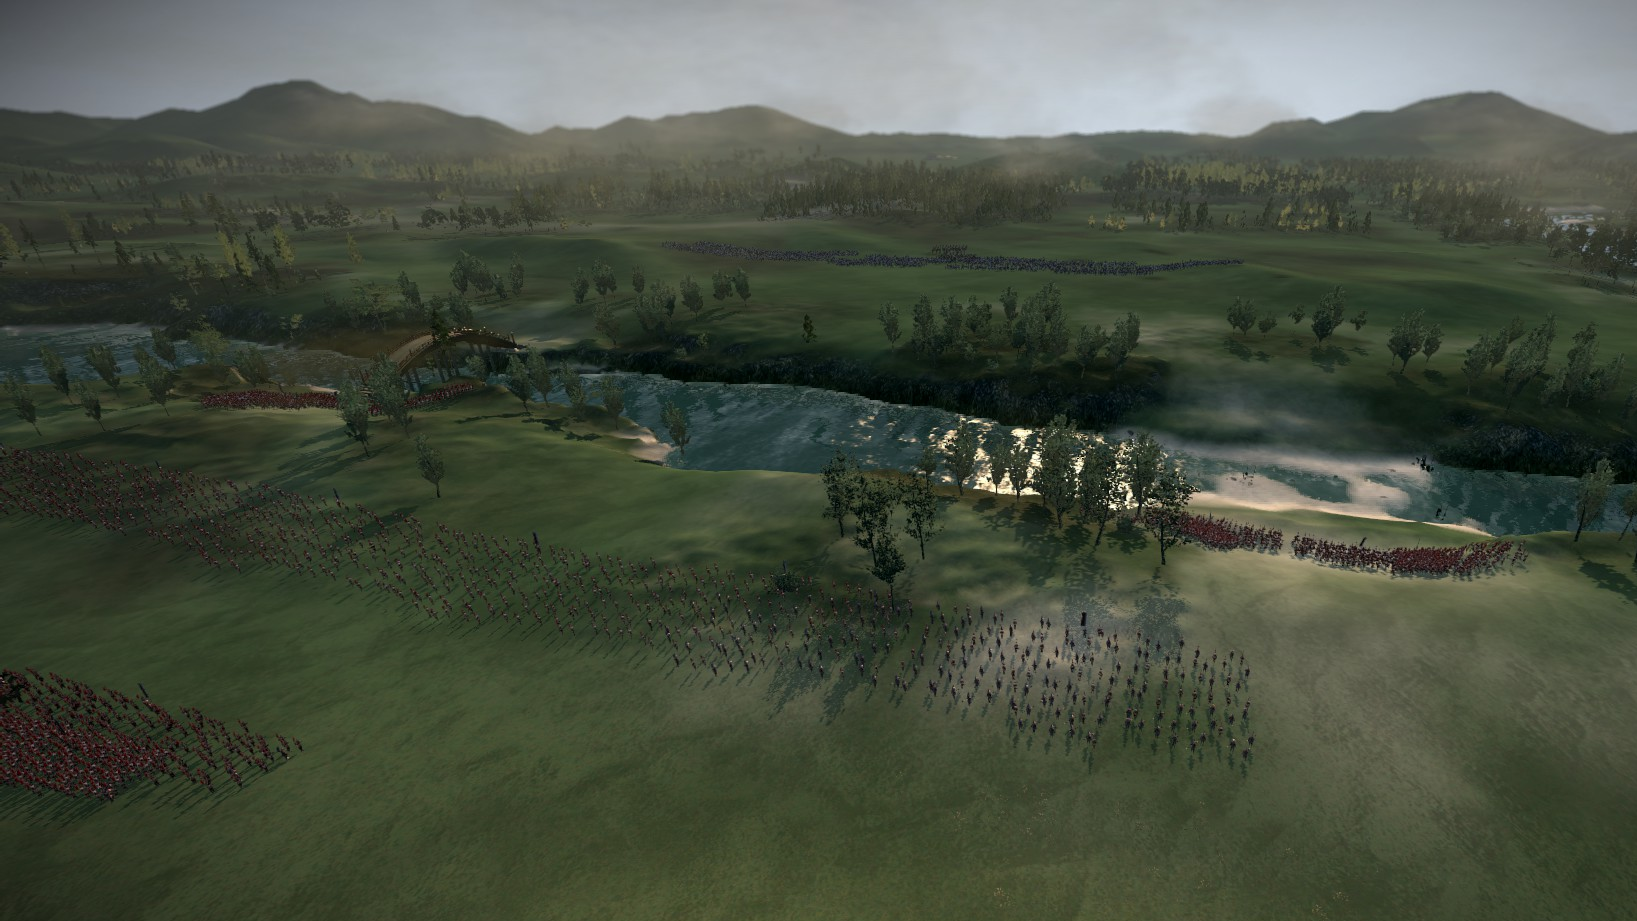
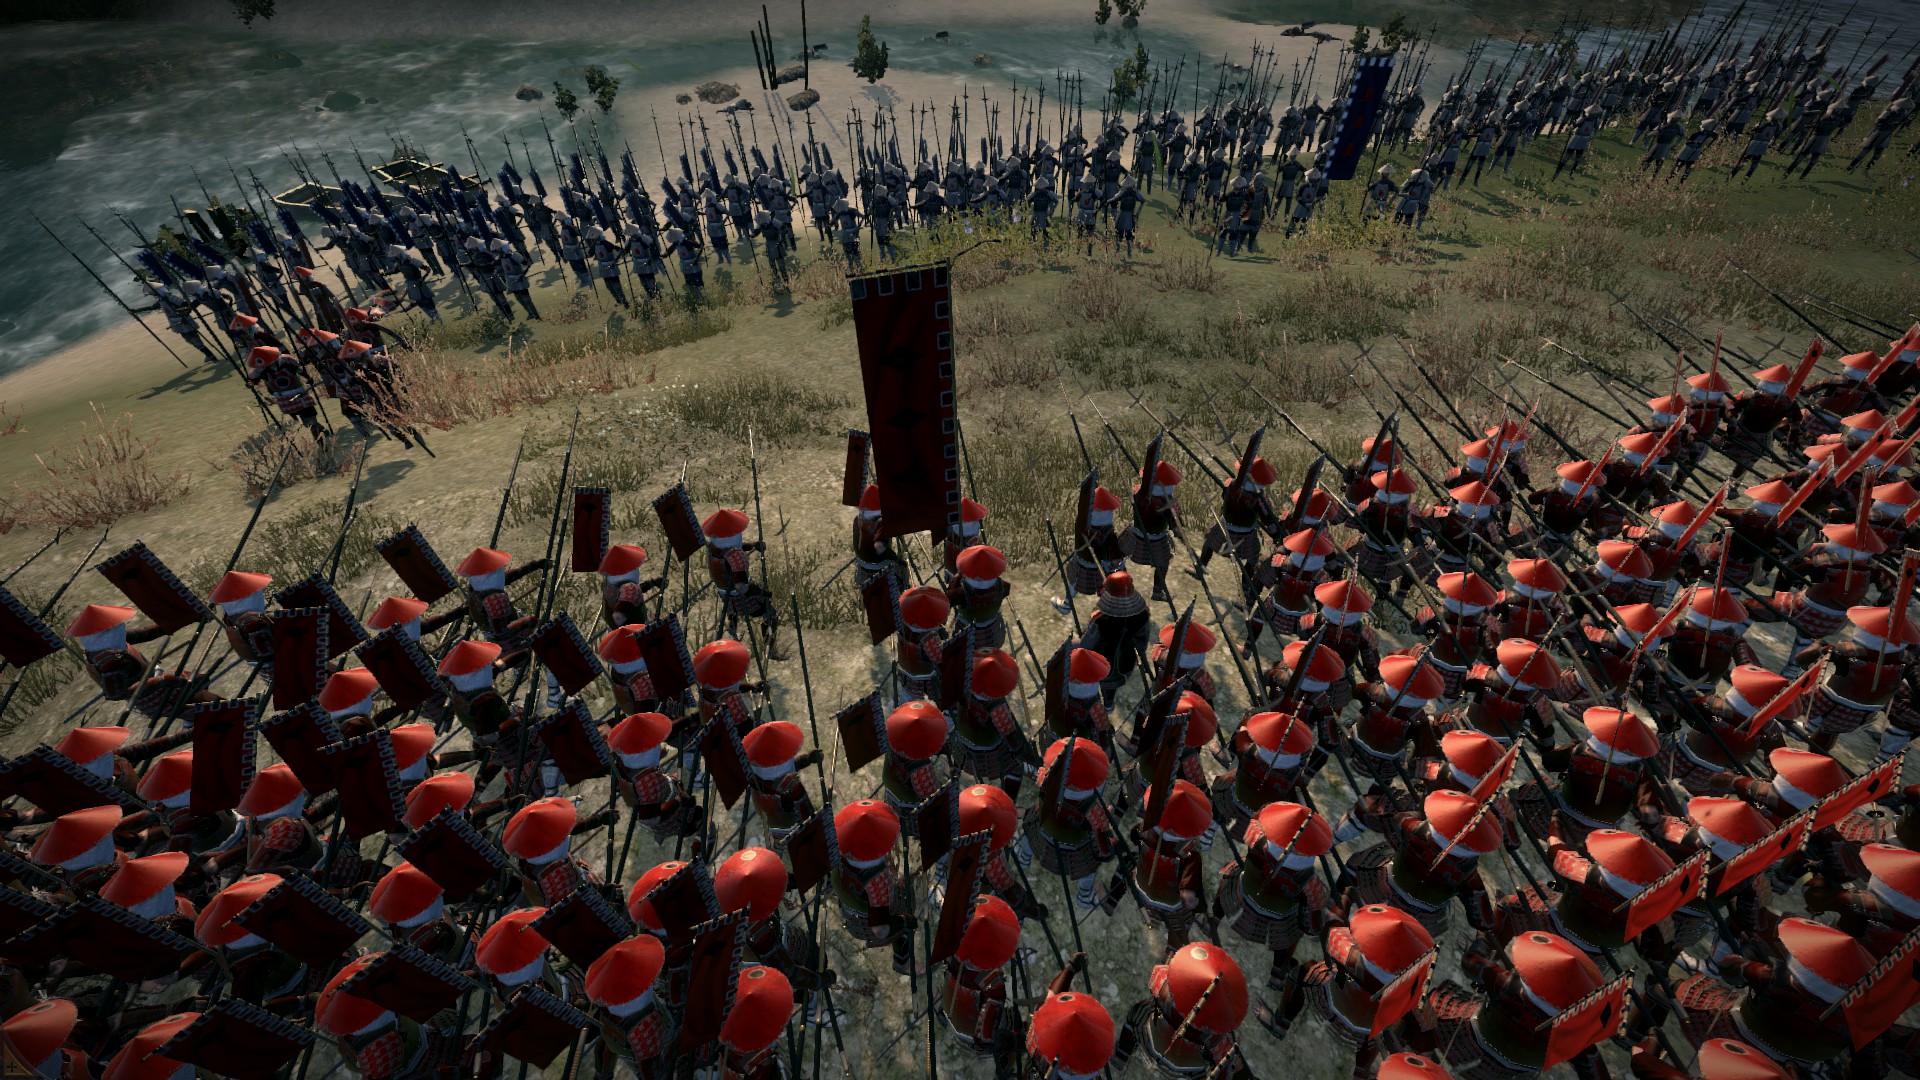
It takes the Uesugi a while to get going, during which I wipe out a careless scouting party. When Uesugi Kenshin eventually marches into North Shinano, he finds Takeda Shingen waiting for him at a river crossing:
 Normally the computer is shrewd about when to risk battle. This time, it’s a bit reckless. Our armies are roughly even in quality, I have the edge in quantity, and the river gives me the best defensive position this side of a castle.
I line up my army at the river crossings: yari troops forming a thick wall of spears at the fords, archers ready to shred bottlenecked attackers. The Uesugi approach:
 … and as the archers exchange shots, I see that the Uesugi are ahead of me in one regard. Shogun 2 has a research system, in which players unlock either economic boosts(such as better farms), or military boosts. At this stage, I’ve gone 100% economic, whereas Uesugi has picked up archer bonuses, and his flaming arrows are chewing up one unit of my spearmen. Perhaps this was why the computer was so confident?
I grit my teeth, and order my men to spread out so they won’t make as easy a target for archers. Next, I send my most depleted unit of spearmen towards the back. The other yari troops remain in formation, spears levelled.
The Uesugi, in grey, charge in:
 The fighting is fierce. Eventually, unable to break the Takeda spear wall, they falter:
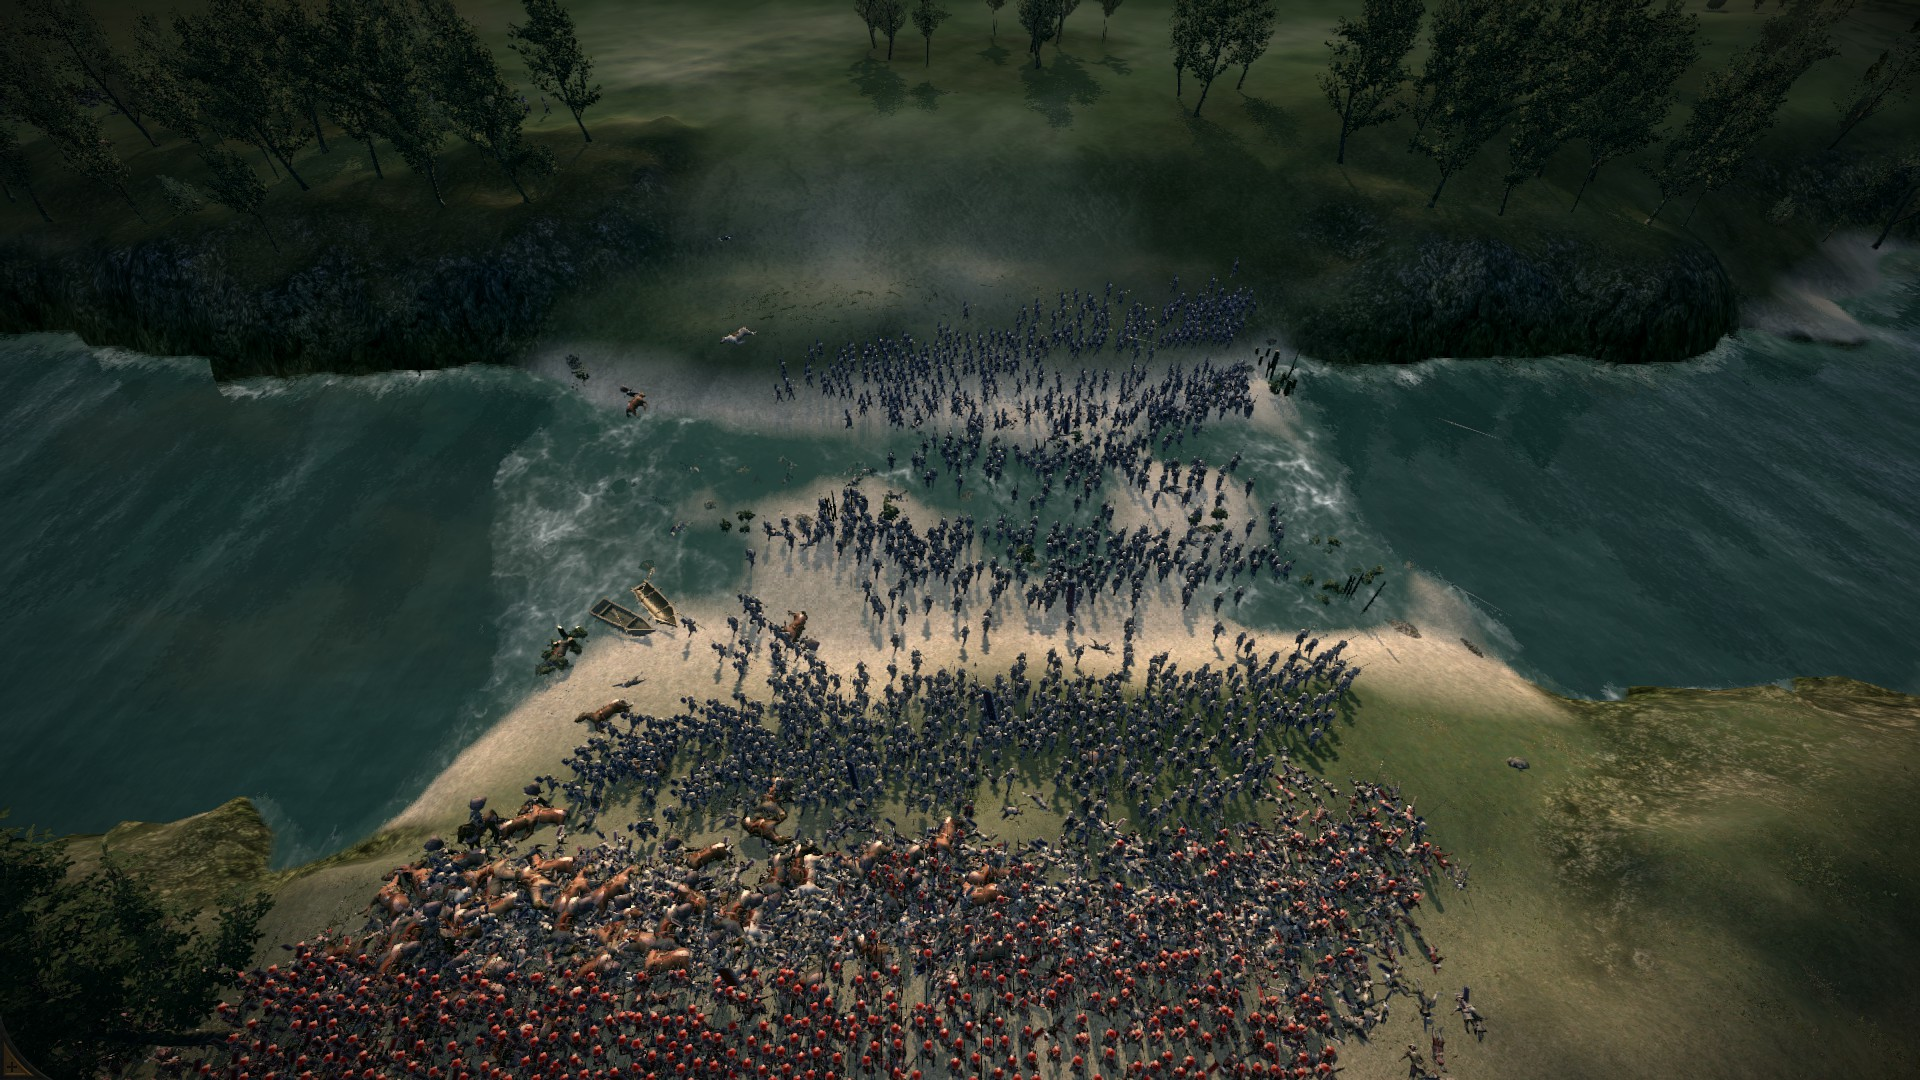
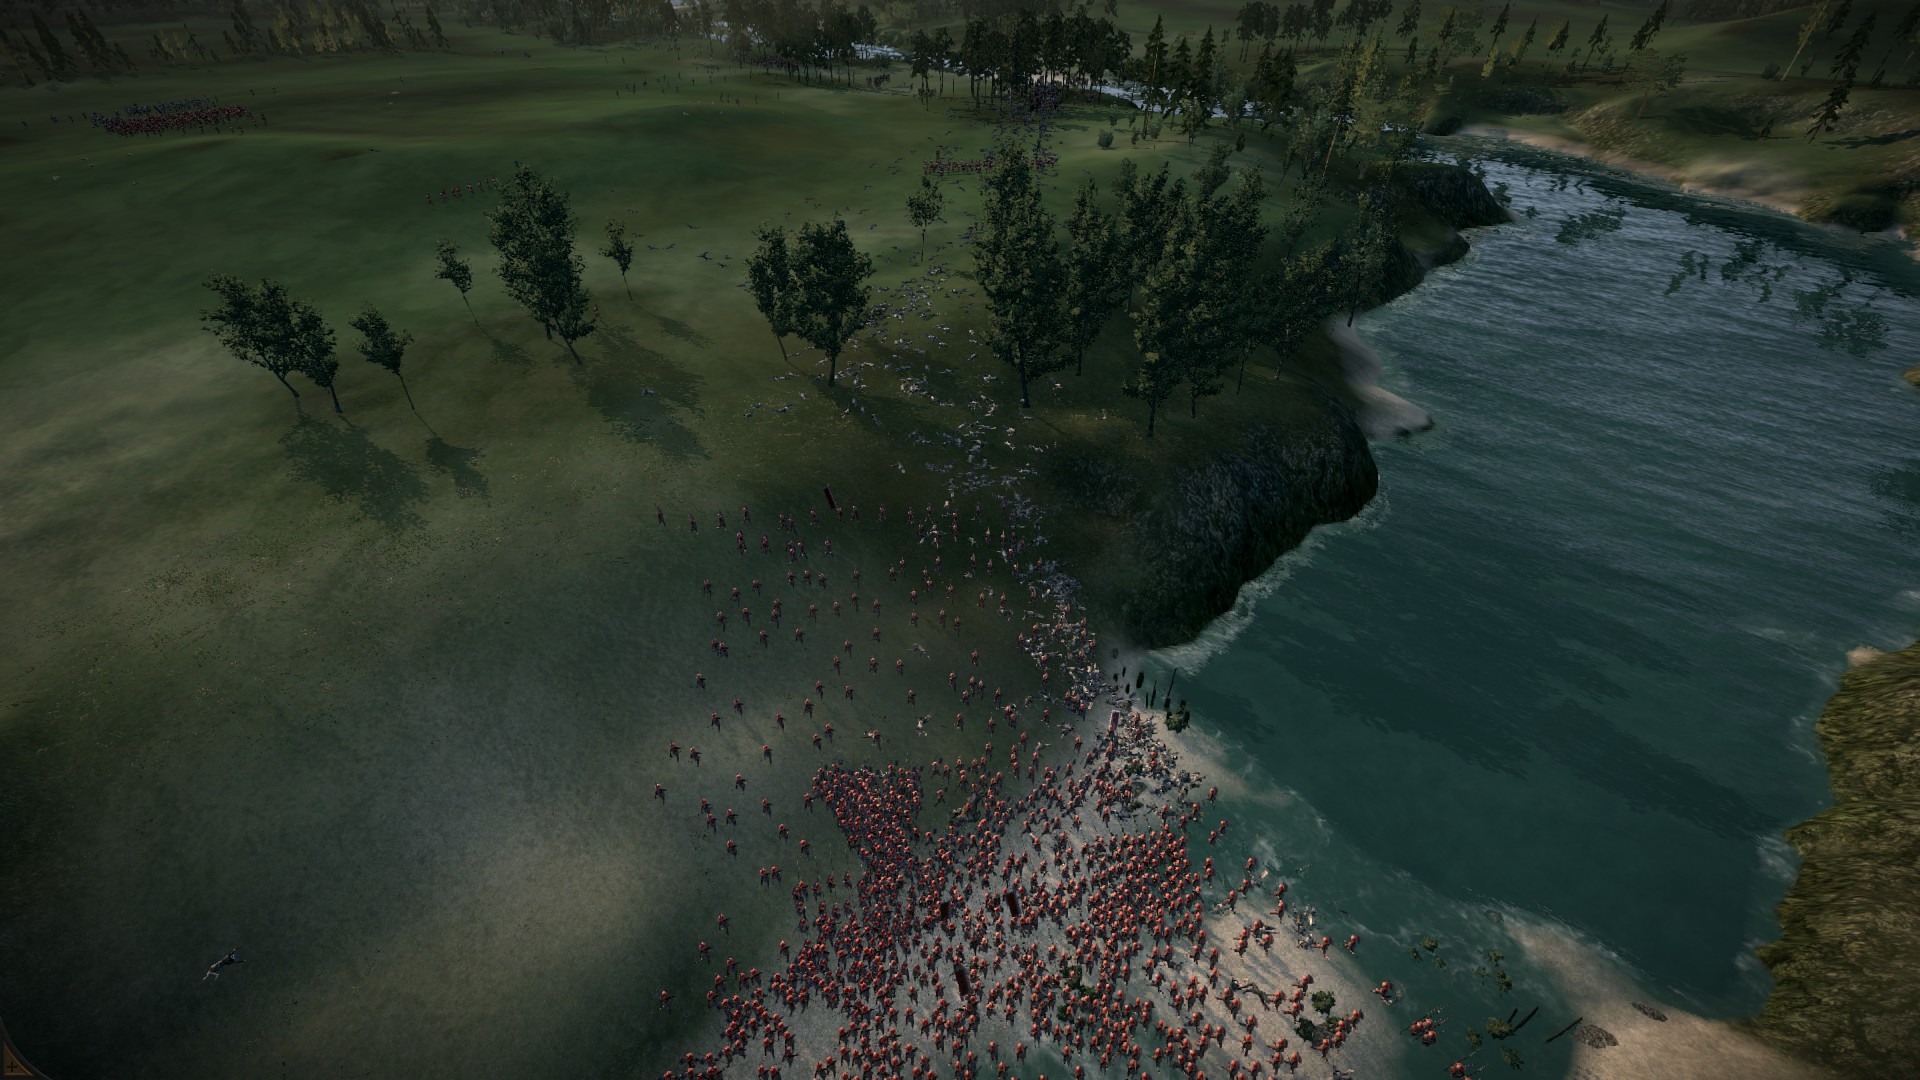
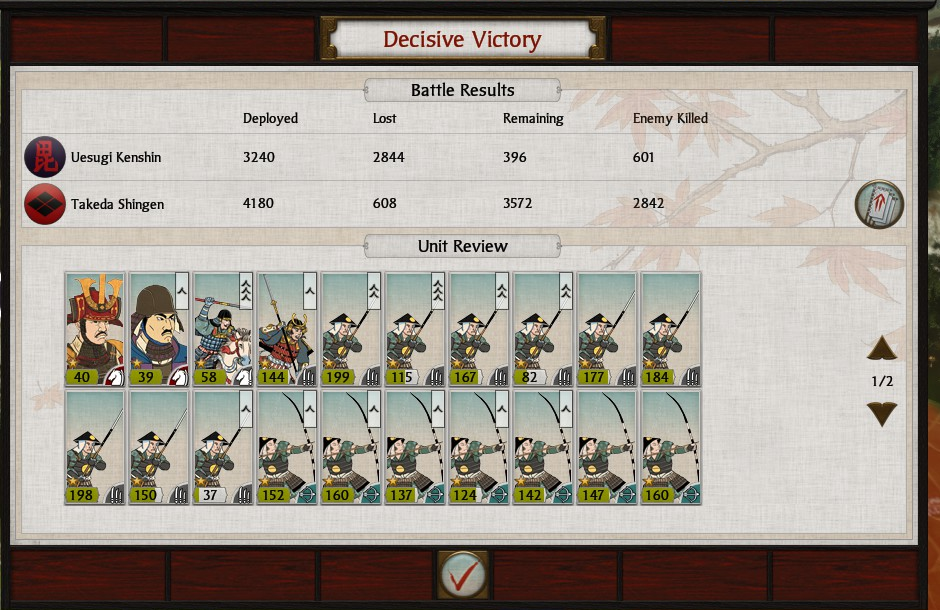
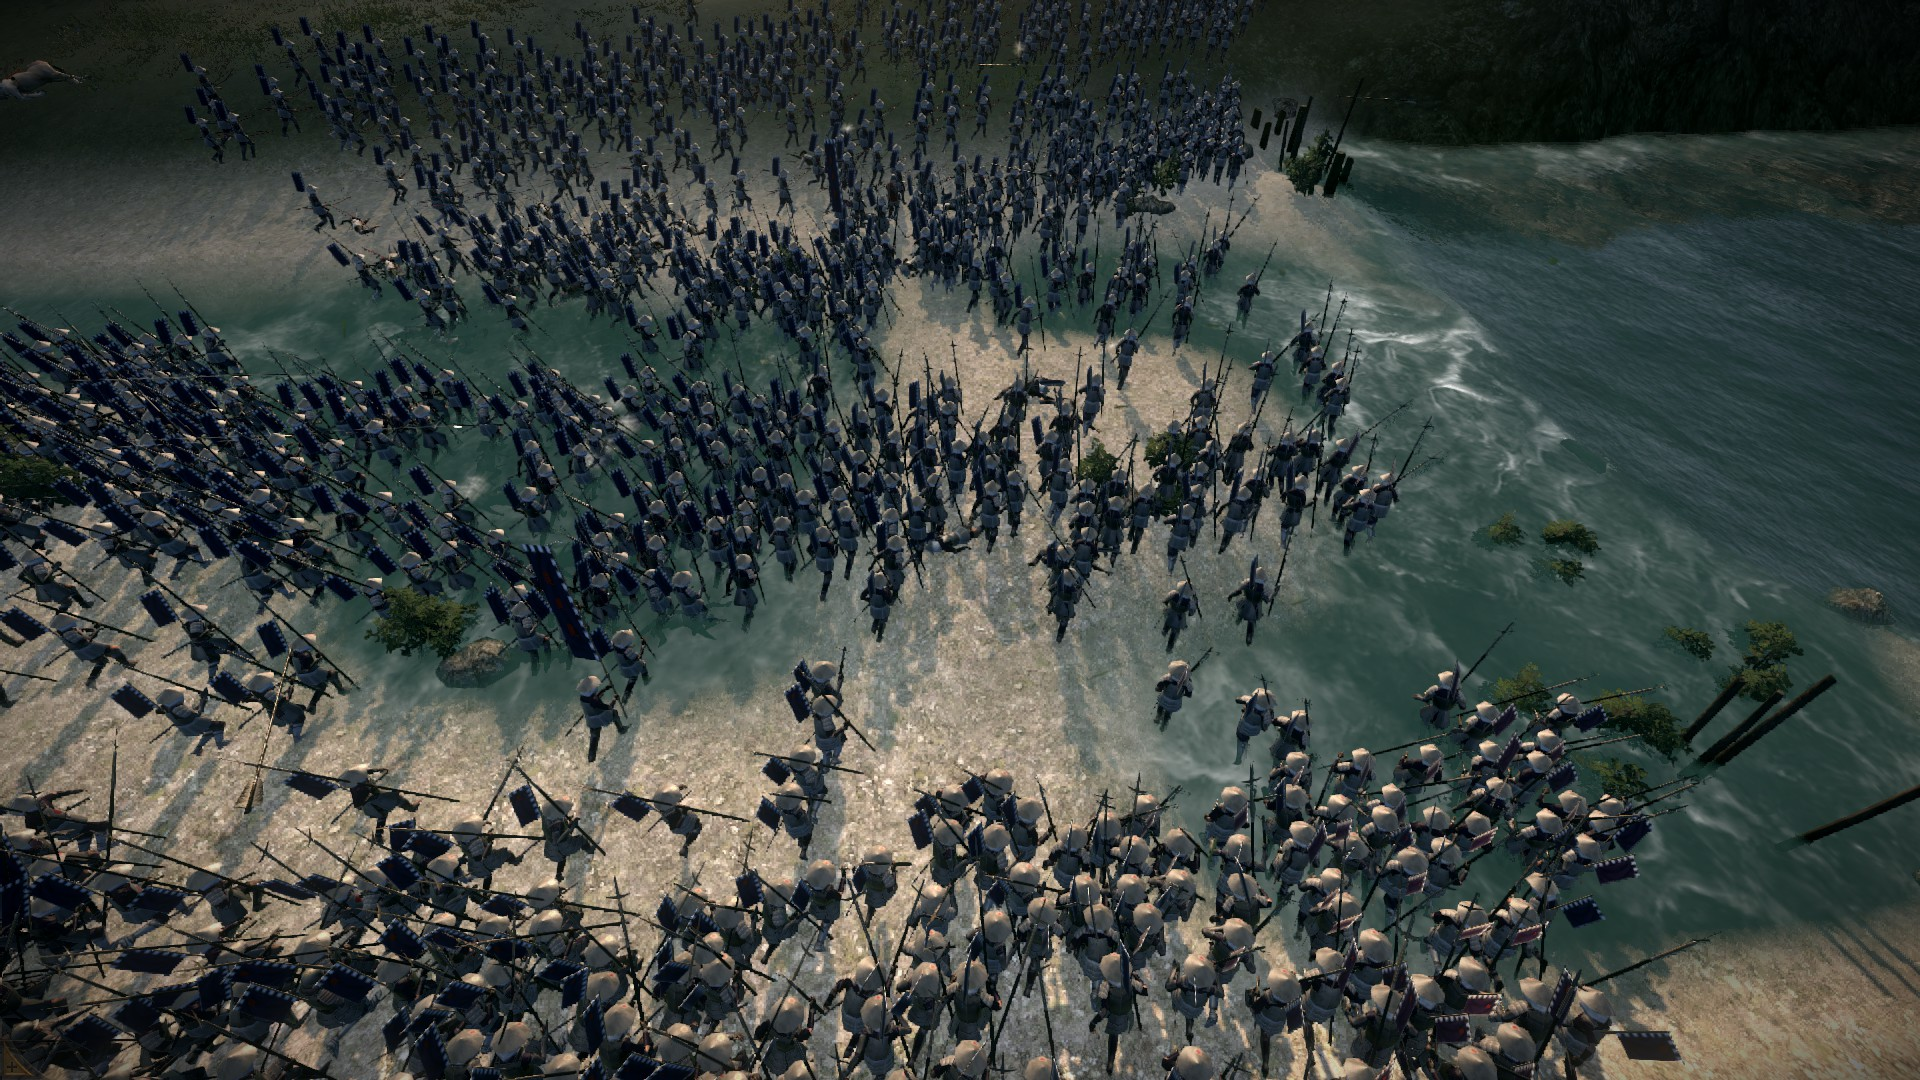 And I unleash the Takeda cavalry, held in reserve, to ride them down. The result is a shattering victory: a long line of Uesugi bodies runs from the fords all the way to the edge of the battlefield. Uesugi Kenshin himself is amongst the dead:
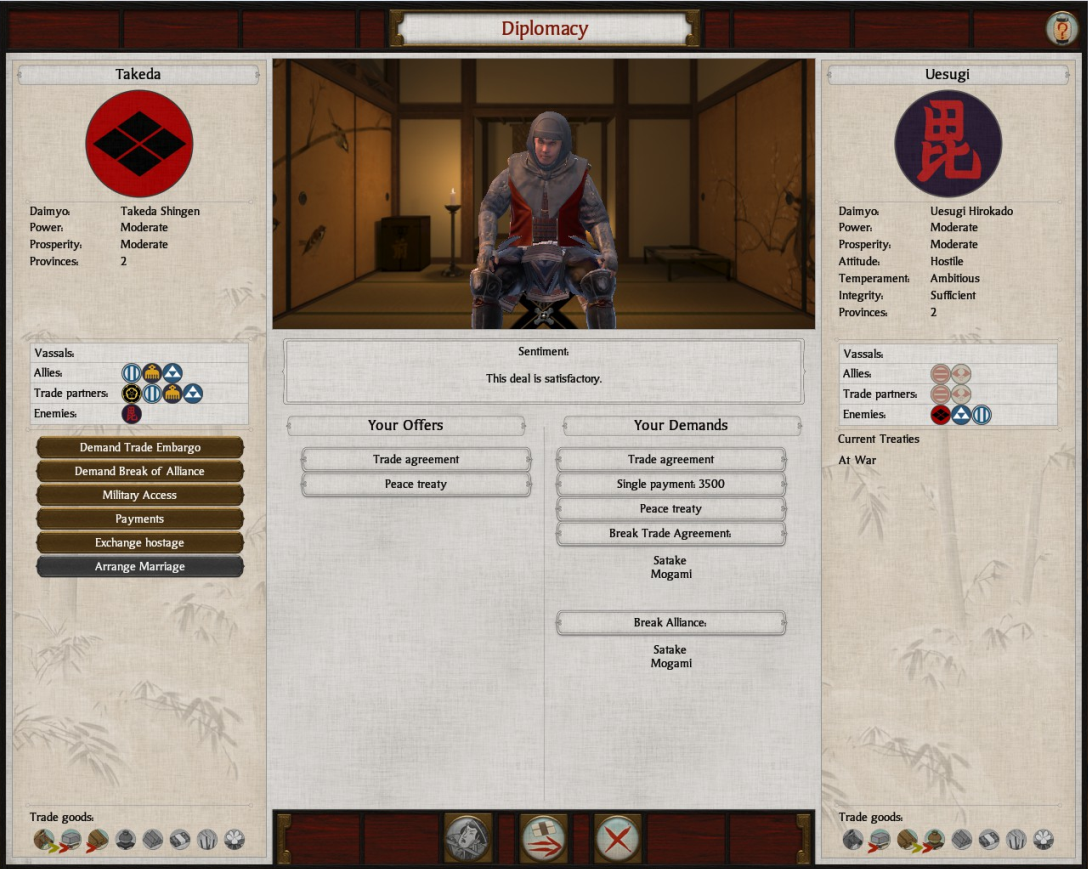
 Displaying more courage than sense, the Uesugi initially refuse to negotiate. After another thrashing at Shingen’s hands the following year, they relent. Uesugi reparations fill my coffers:
 My northern border now secure, I plan my next campaign. With the south blocked off by my new Hojo friends, I plan to go west instead, against the Oda clan. The Oda have occupied South Shinano; my plan is to send my main army into South Shinano to drive Oda out, then march west until I burst into the rich territories of central Japan.
Again, circumstances force a change.
March to the Sea
The fall of the Hojo clan is sudden: one turn, I notice that I no longer border them in Musashi. A few turns after that, I receive a message that they’ve been destroyed. Instead, I now share my southern/eastern border with two clans, allied to each other: the Satomi and Satake. Evidently confident after their blitzkrieg against the Hojo, the Satomi are quick to declare war against me.
There lies danger — and opportunity. It’s back to plan A: marching south. Leaving a holding force in North Shinano under the command of his brother Nobushige, Takeda Shingen takes the clan’s main armies southward, against the Satomi.
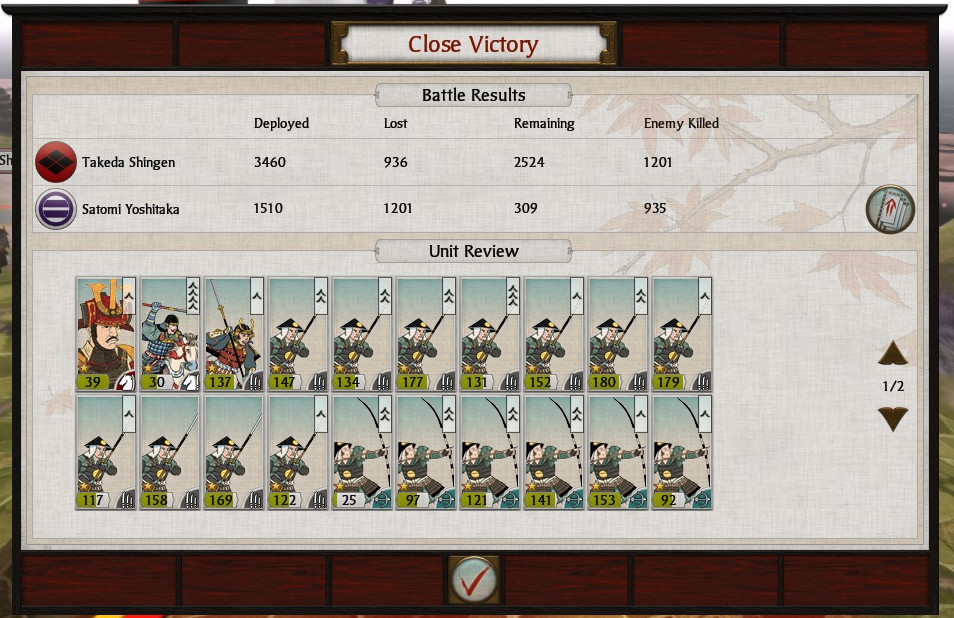
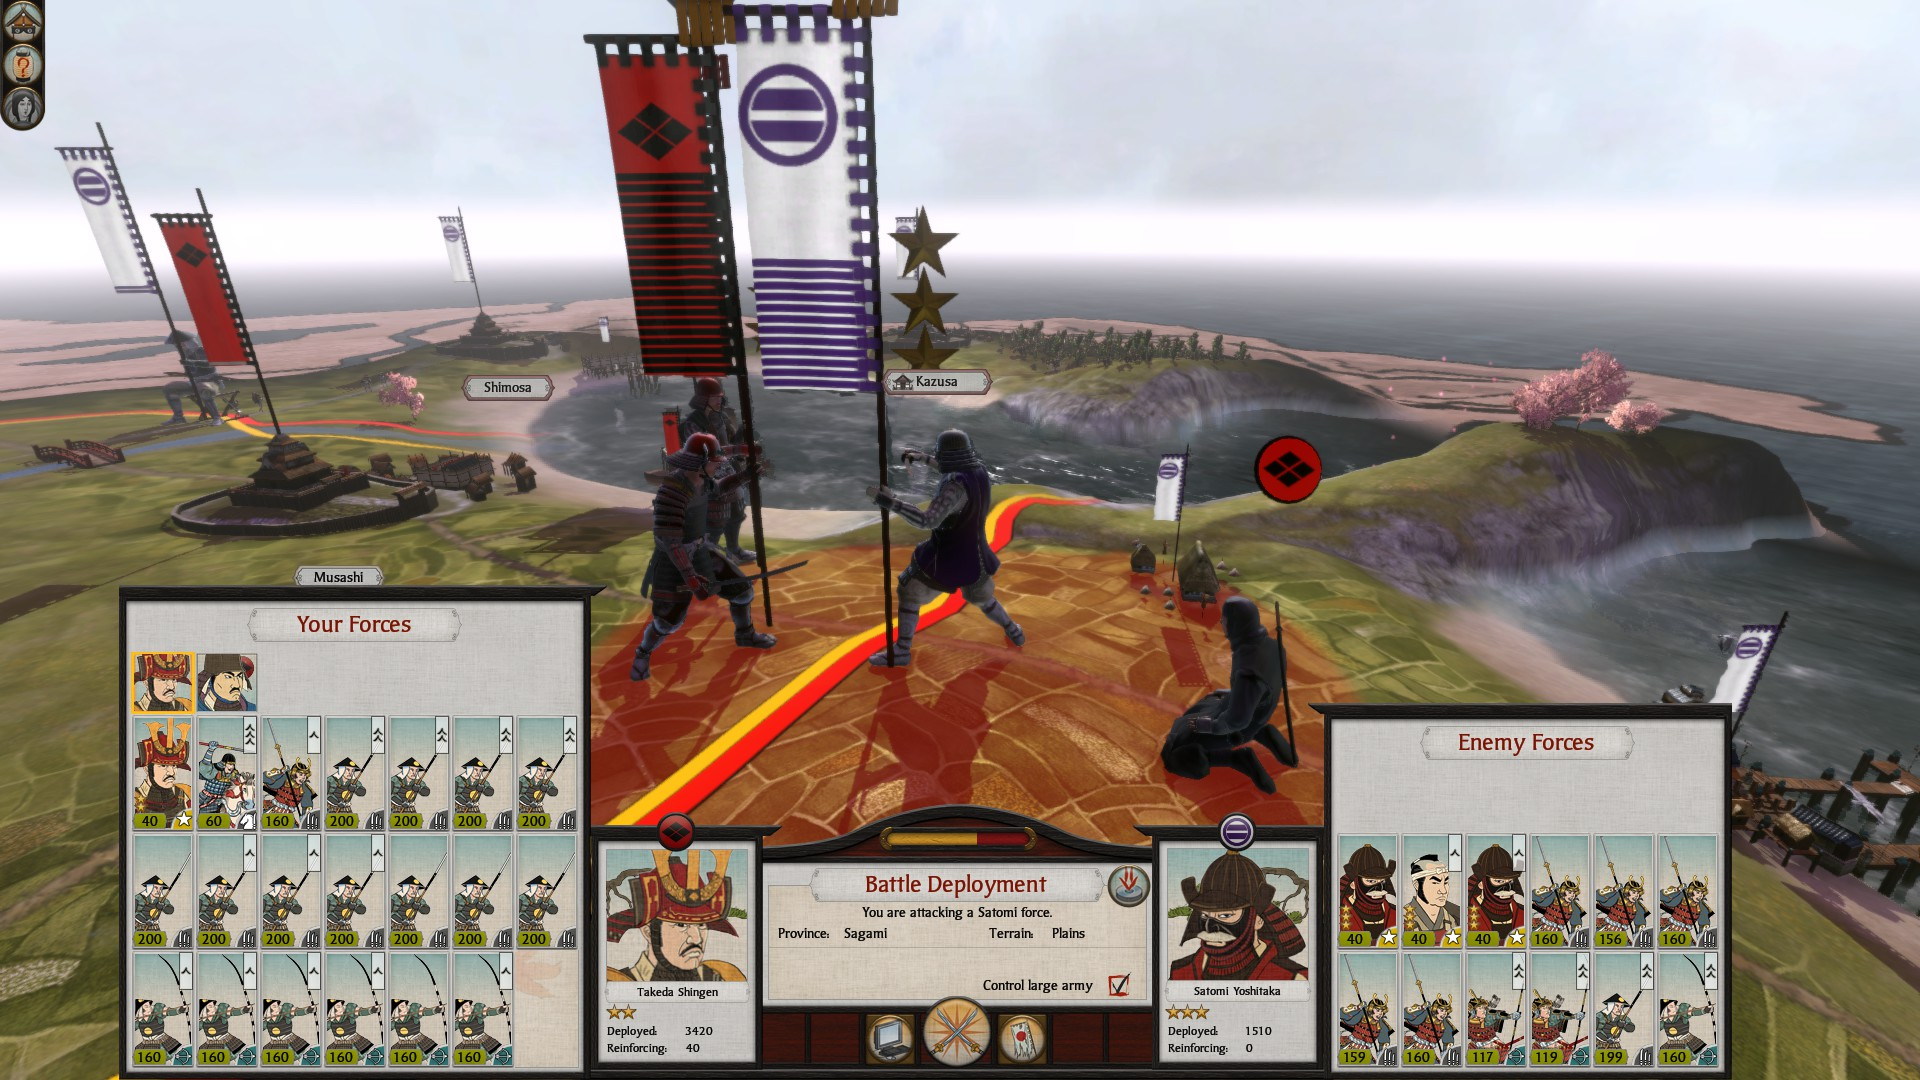 The Satomi army is mostly samurai; mine is mostly ashigaru — and more than twice the size. Samurai valour is little help when outflanked; after a pitched battle, the Satomi are broken.
 The south, with its armourer, gold mine, and ports, falls into Takeda hands. I dig in to consolidate my gains, while preparing for a renewed offensive against the Satomi and their Satake allies (who have just declared war on me). And I decide that makes a good point to end Part 1.
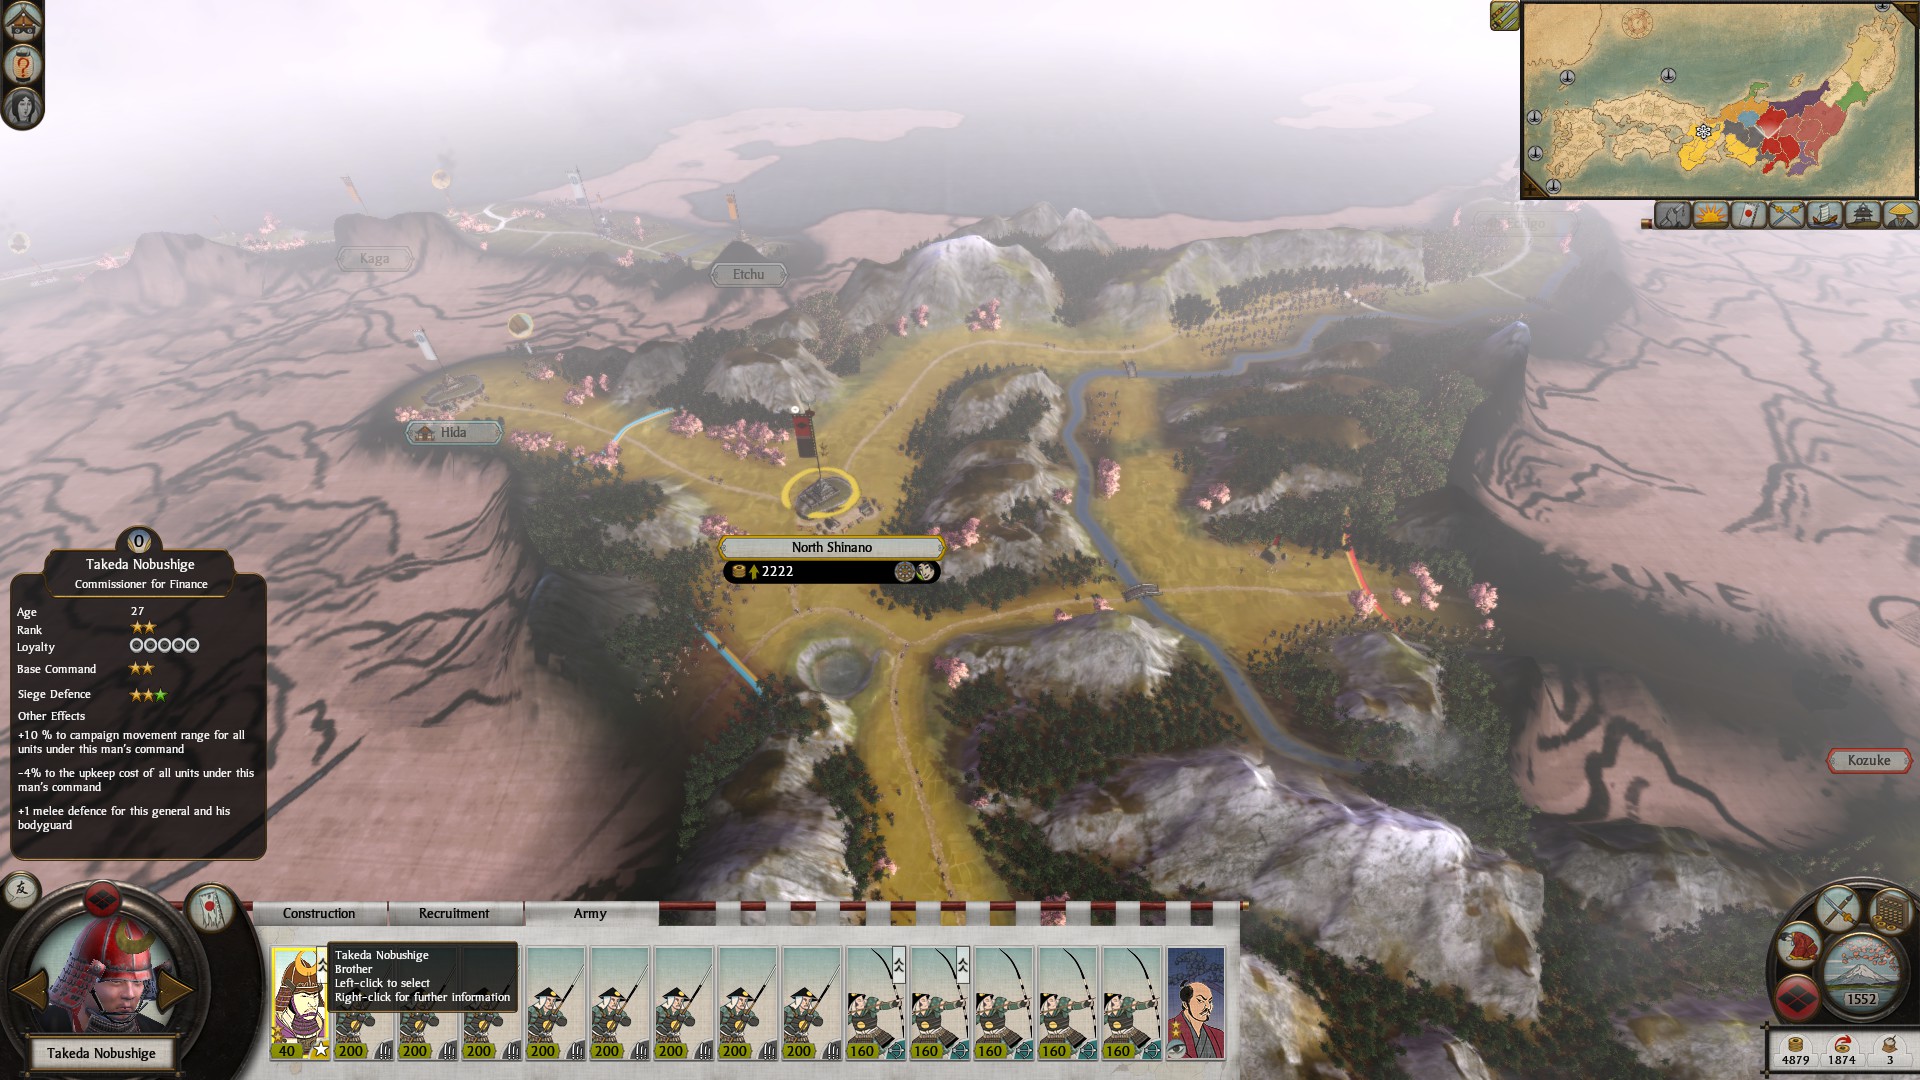
Here is the situation in the north. North Shinano is defended by a largish army under Takeda Nobushige, Shingen’s brother. Hida to the northwest is held by a friendly clan. So is South Shinano to the southwest — my Imagawa allies conquered it from the Oda clan. The real dangers are the Satake possessions in Kozuke (east) and the sullen Uesugi in Echigo (northeast).
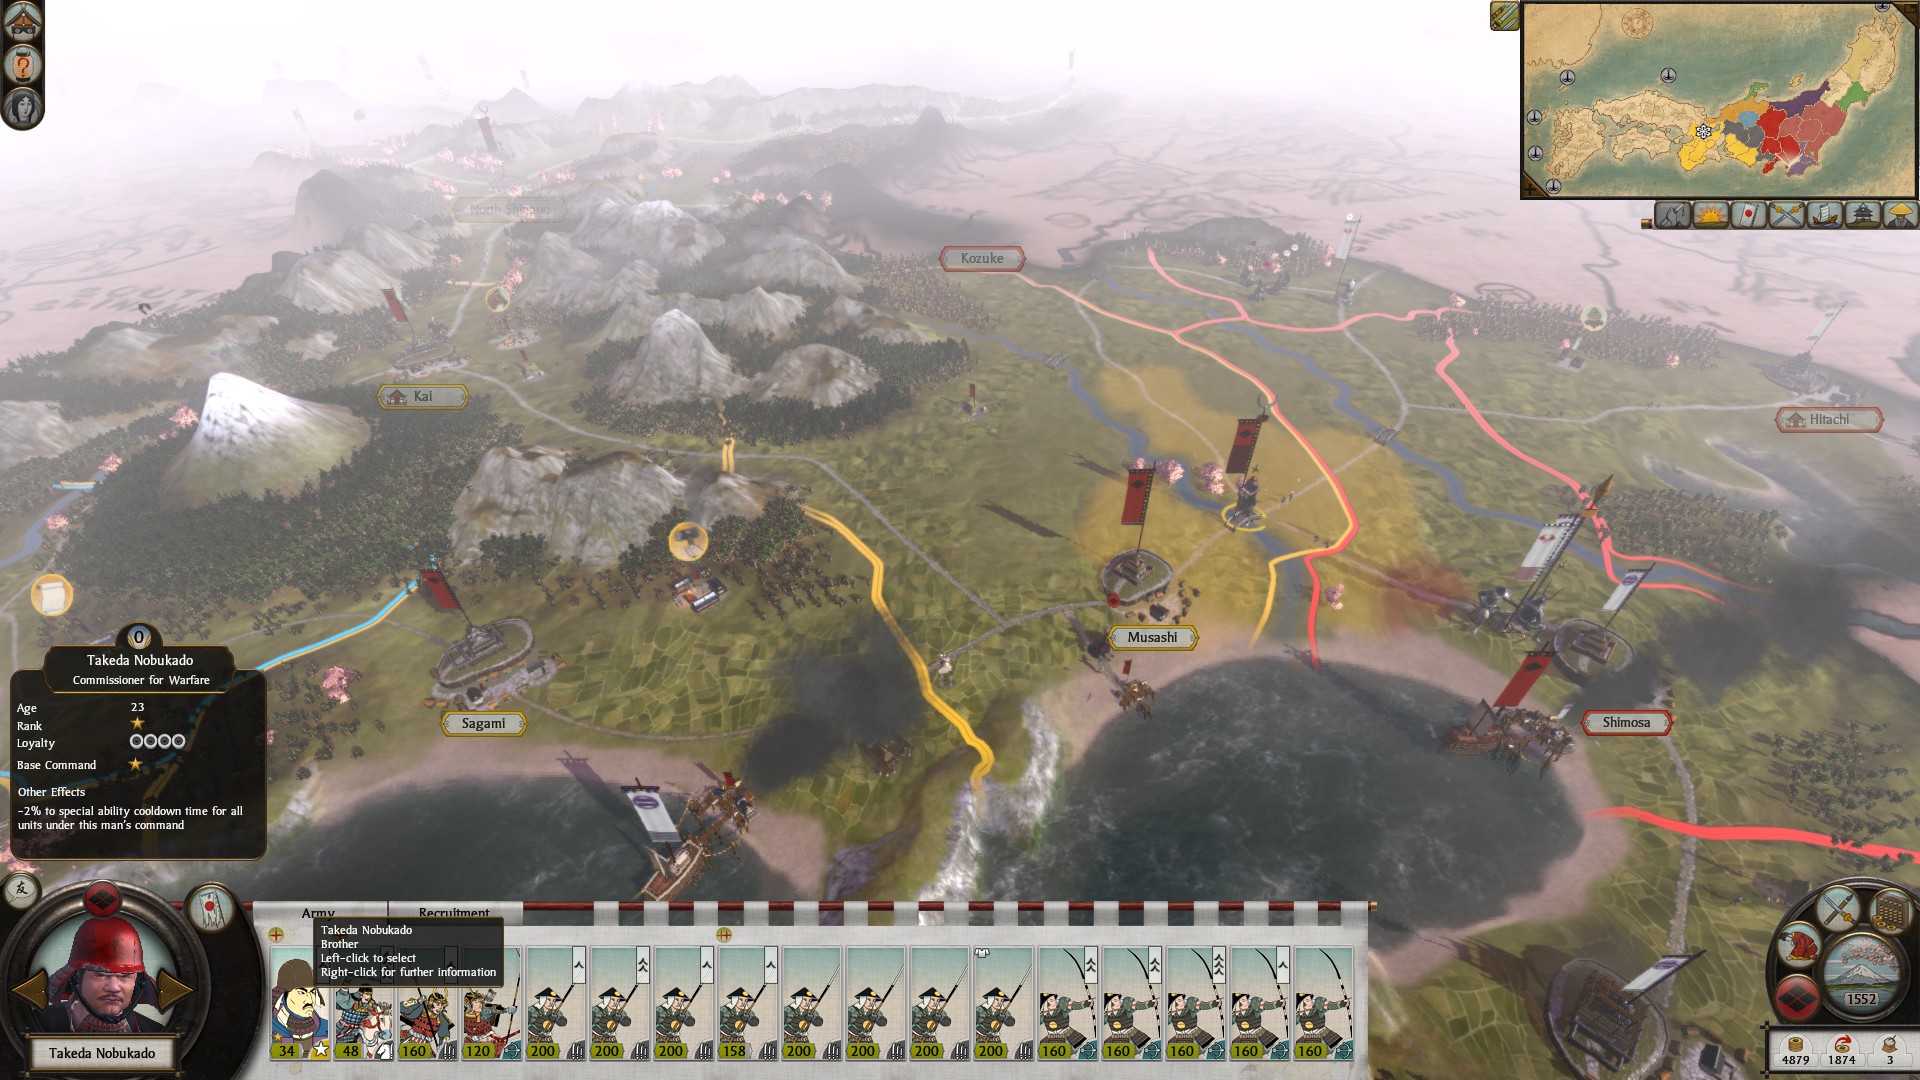
 Here is my southeast border. Musashi is my easternmost possession; the river crossing into the province is guarded by Shingen’s other brother Nobukado. To the east, my enemies the Satomi and Satake are massing troops for a rematch.
 Lastly, here is my southwest border. Shingen himself is in newly conquered Izu with a small army. The western border is safe for now, as Suruga is in the hands of the friendly Imagawa. This situation may change, if Imagawa is driven out.
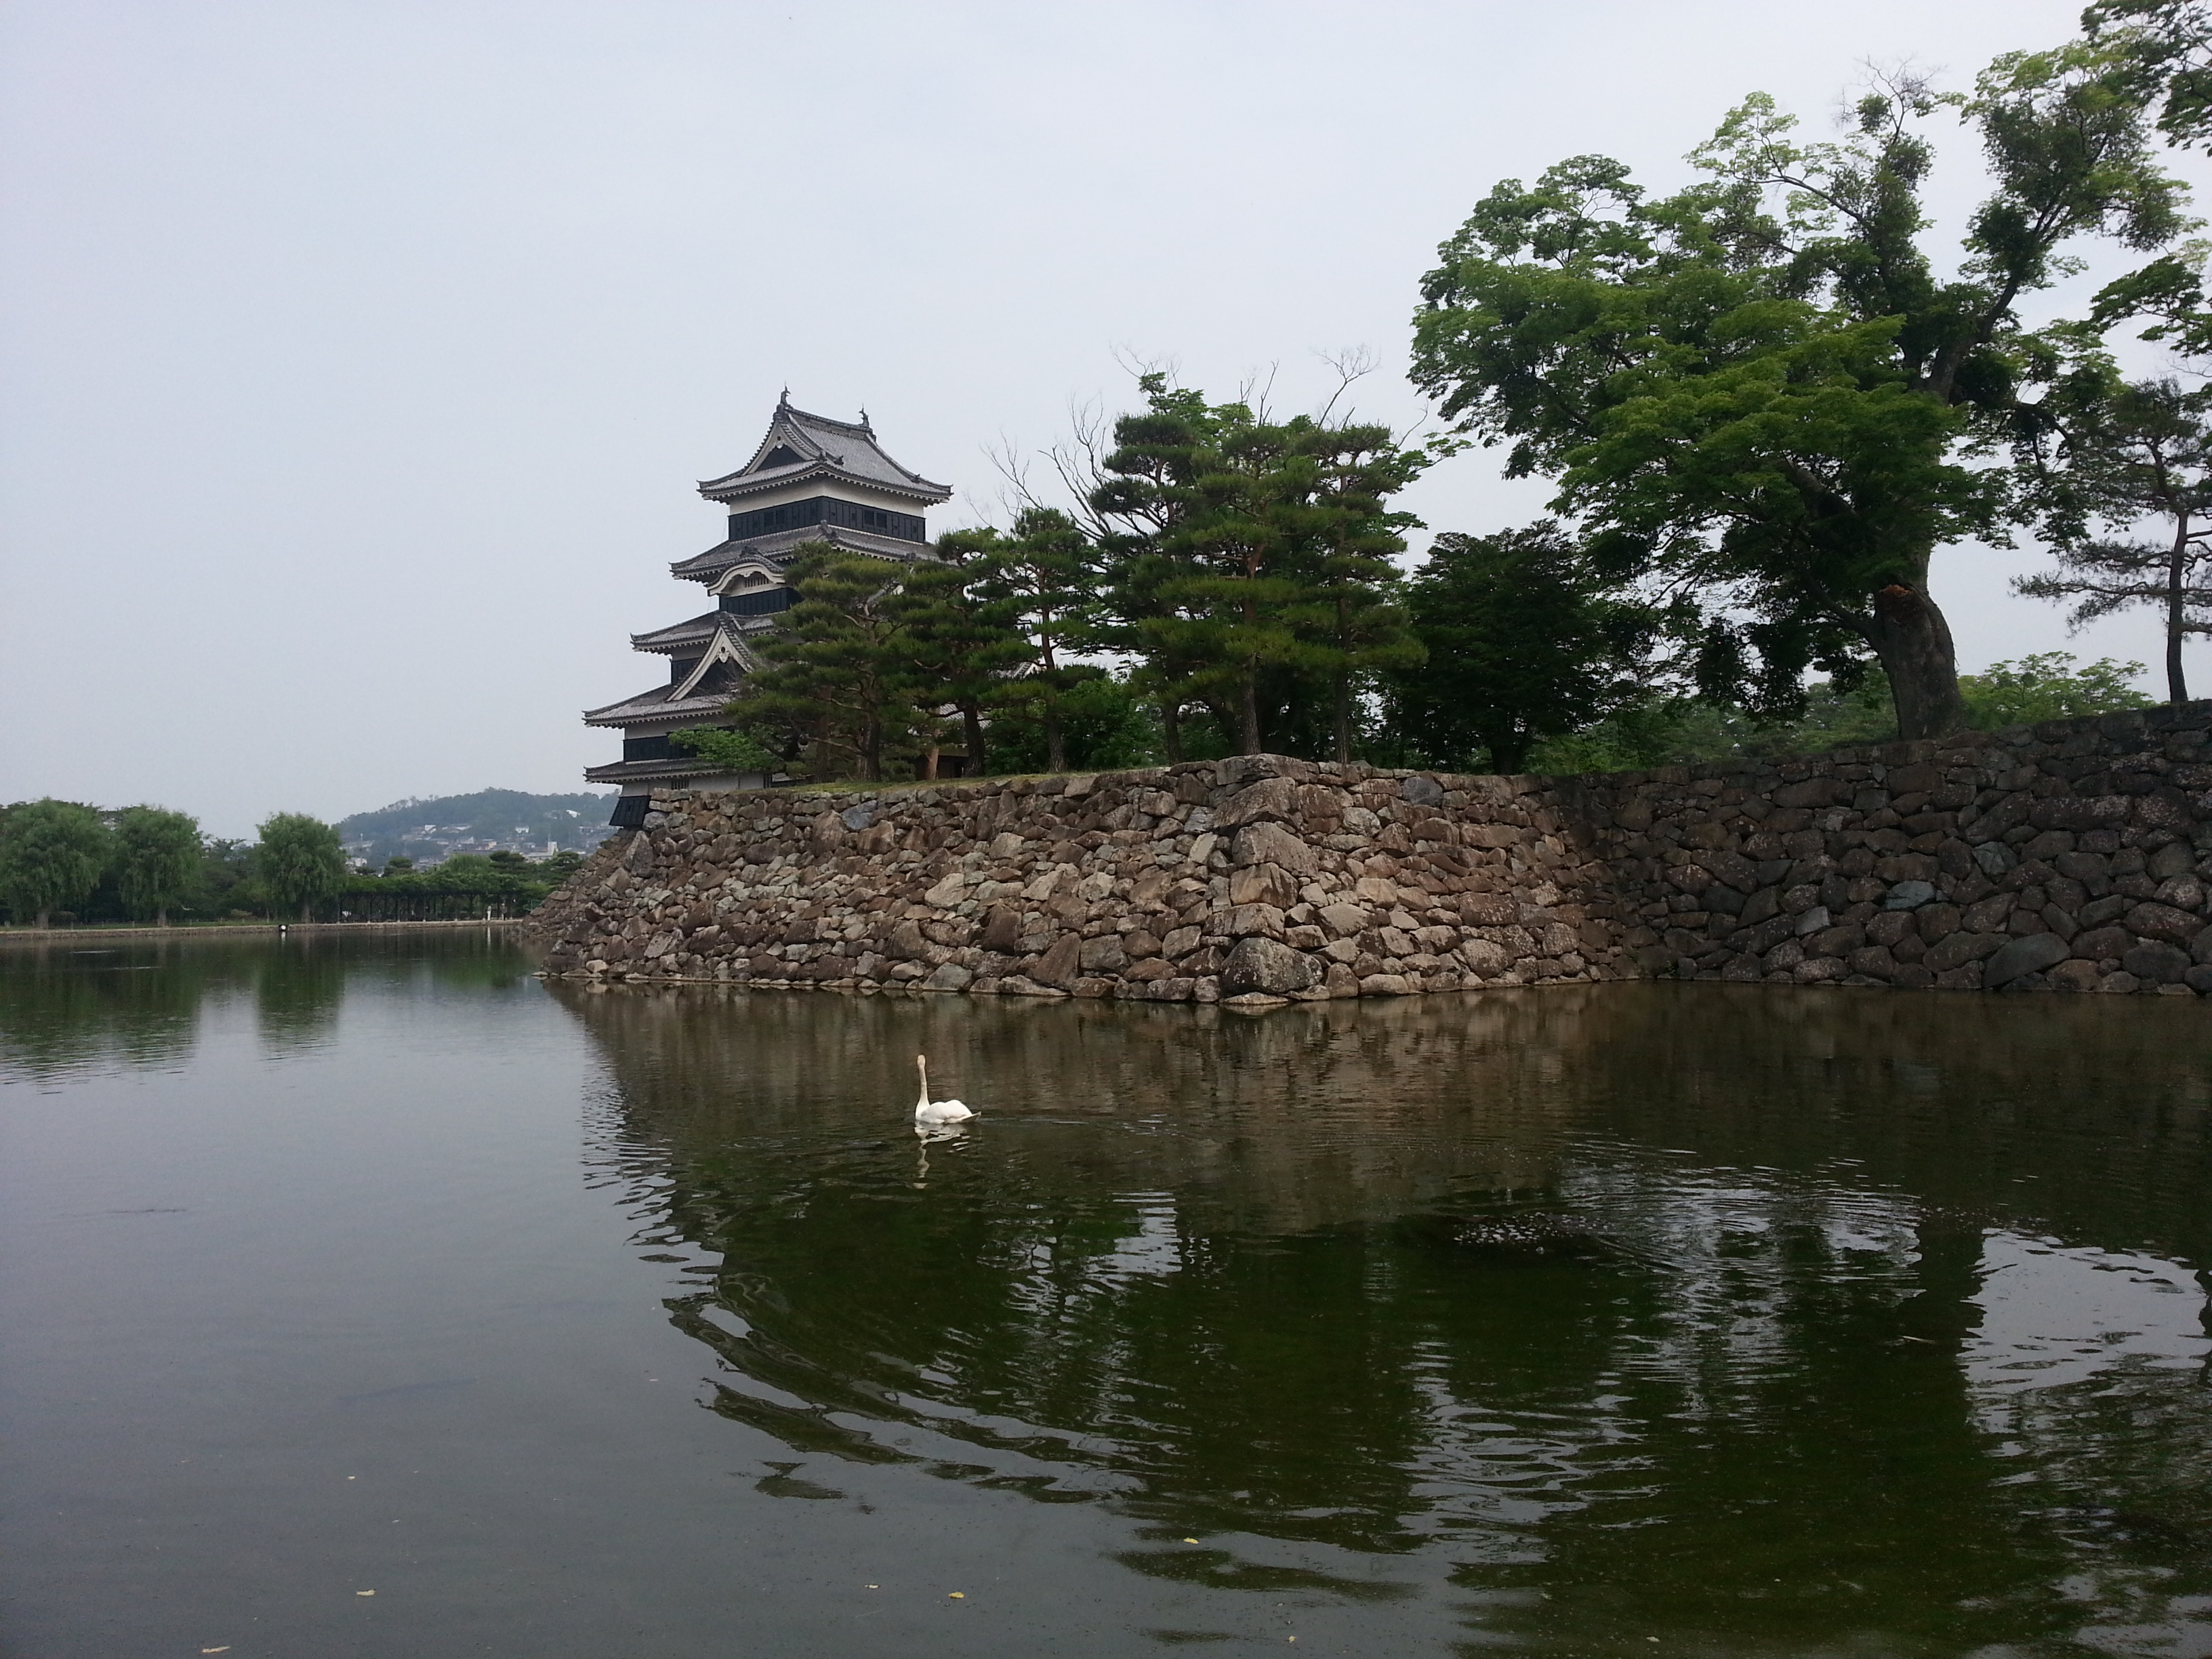
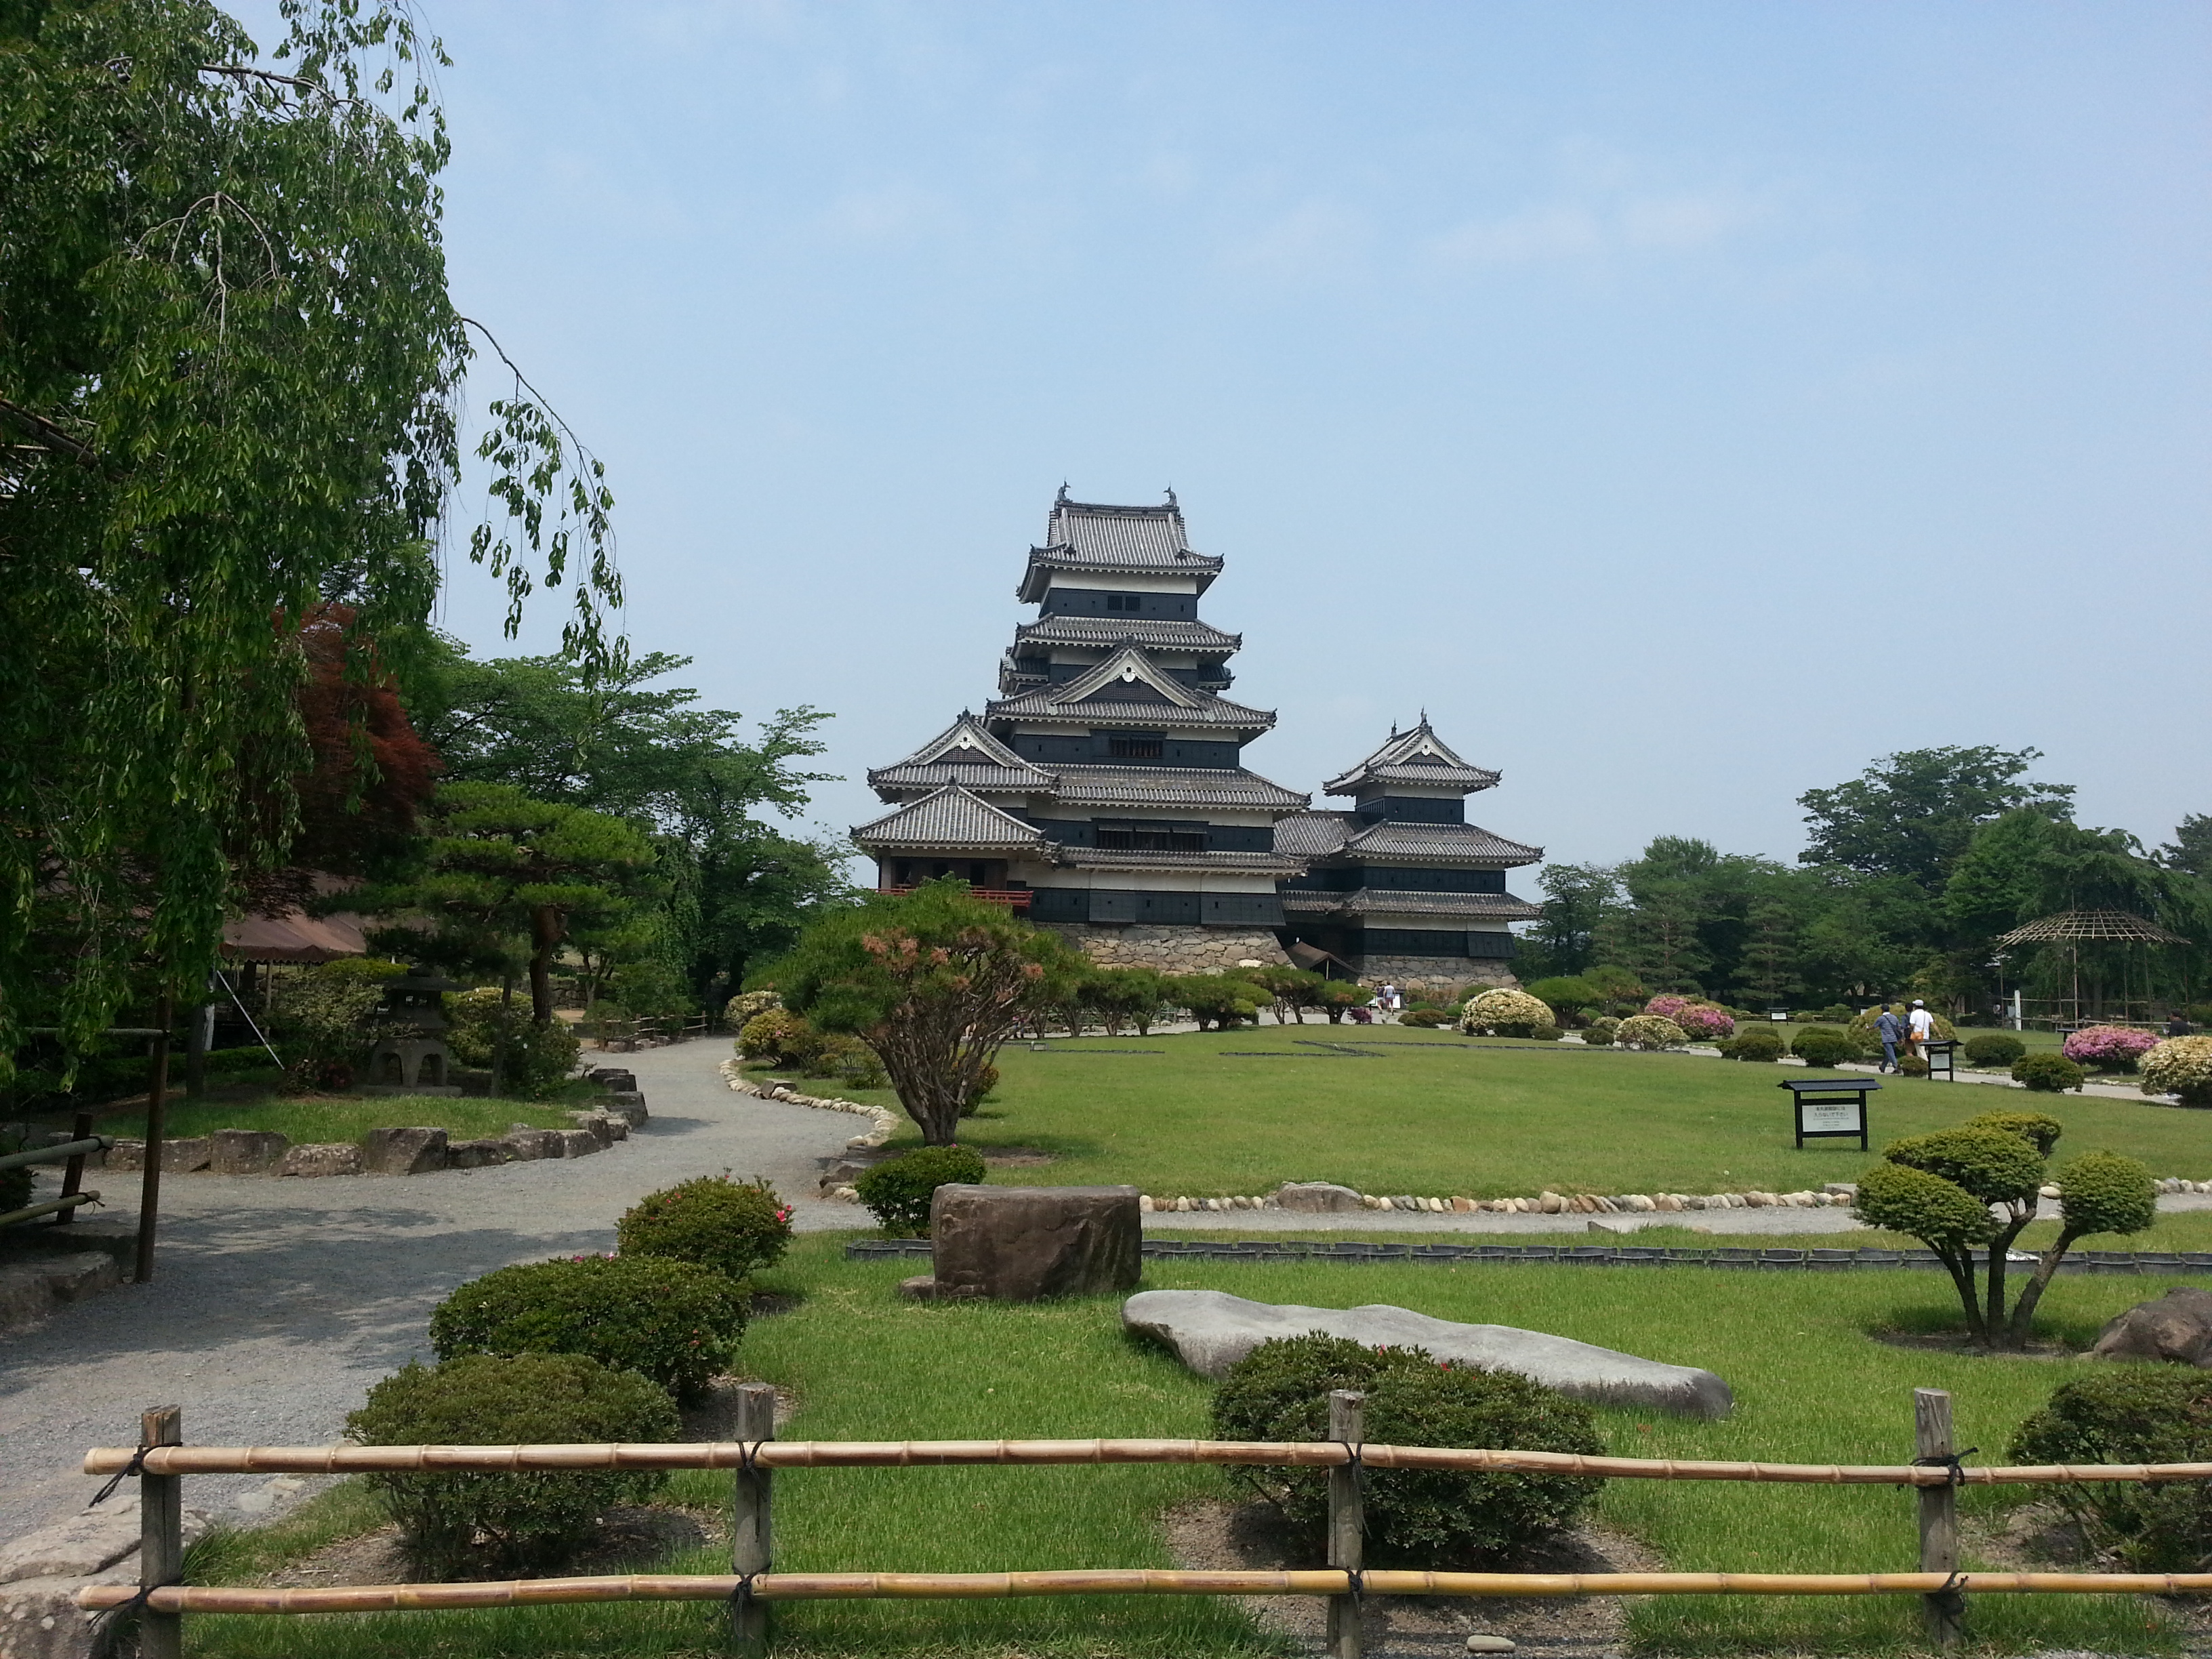
 Finally, here are some bonus photos of present-day Matsumoto castle, in North Shinano. I’d like that moat the next time I defend a castle!
Further reading
I’ve had two Stephen Turnbull books about the samurai on my shelf since childhood — one is a chronological history, the other is a reference book. I hadn’t realised that the former was so expensive…
Frogbeastegg’s Guide to Shogun II is the definitive resource for the single-player campaign.
- Eventually, ashigaru can also be equipped with matchlock arquebuses. I’m not sure if I’ll unlock those before the game is over. ↩
Discover more from Matchsticks for my Eyes
Subscribe to get the latest posts sent to your email.