
- Let’s Play FTL: Faster than Light! Part 1: The Voyage Begins
- Let’s Play FTL: Faster than Light! Part 2: Things Get Real
- Let’s Play FTL: Faster than Light! Part 3: A New Hope
- Let’s Play FTL: Faster than Light! Part 4 (FINAL): Return of the Kestrel or, the Federation Strikes Back
- FTL: Faster than Light — The Verdict
It is a period of civil war. Rebel spaceships have overrun most of the Galactic Federation. During the battle, Federation spies managed to steal secret plans to the Rebel’s ultimate weapon, the REBEL FLAGSHIP, an armoured behemoth with enough power to obliterate an unwary player. Pursued by the Rebel armada, Captain Peter races home aboard his starship, custodian of the stolen plans that can bring victory in this game…
Captain’s log, starship Kestrel
Stardate 2012.09.20
Introduction
Three times I’ve attempted this journey. Three times I’ve failed, the Kestrel – the game’s starting ship – turned into so much space junk. Now, by the grace of the alien artefact known as the “New Game” button, I can make a fourth attempt.

For this try, I’ll use the Kestrel again. There are other ships available in the game, and I’ve unlocked one (the Torus), but I want to try to see this through with the Kestrel first. The Kestrel packs a well-rounded punch, mounting a powerful burst laser and an ammo-chewing but potentially devastating missile launcher. Once I upgrade its energy shield, it should see me easily through the first few of the game’s eight sectors (each sector is progressively harder). Its starting crew of three is too small, especially when considering there are four systems (helm, engines, weapons, shields) to be manned, but c’est la vie.
After naming my initial crewmembers “Han”, “Luke”, and “Leia”, and ensuring the difficulty is set to “Easy”, it’s time to begin this journey.
Sector One: Civilian Space

The first sector begins uneventfully. The Kestrel skirts an asteroid field, buys fuel at a space station, and ignores a distress beacon (our mission comes first!). On our fourth jump, we meet our first Rebel.
Several barrages of the burst laser neutralise his weaponry before he can do too much harm, and when he tries to flee, another barrage does the same for his jump drive. Beaten, the Rebel tries to surrender. We refuse. We need the scrap metal from his hull: scrap is the game’s currency, used for purchasing weapons, upgrading components, recruiting crew, and paying for fuel and repairs. Upgrades are life. Scrap is life. And soon enough, we have more of it. The scrap quickly goes into upgrading our shielding system, and onto the next beacon we go.
This time it’s another Rebel, a small transport. I demand surrender. The Rebel refuses, and manages to flee in one piece. I growl, and jump away to the next beacon. Upon consulting the star map, I see the Rebel fleet has now arrived in sector! The Rebel main fleet begins each sector several jumps behind the player, and it’s not a wise idea to let it catch up – running into fleet forces a high-risk, practically zero-return battle. However, I’m still well ahead, giving me the luxury of exploring the sector a bit more. A hidden Federation outpost gives me a bit of scrap and a quest to rescue a Federation base in the next sector, but my luck doesn’t hold up at the next location.

While boarding a space station to look for survivors, Luke is struck down by a fatal illness. The measly scrap I pick up seems a lousy compensation for losing one of my scarce crew.
I roll the dice again. One more look around before I head off to the next sector… and what should I run into but an enemy, a Mantis fighter.

The Mantes are vicious if they can teleport over to your ship, but luckily for me, the fighter is too small to have a teleporter. I won’t have to worry about Mantes slaughtering my diminished crew in melee! Our first salvo takes out the Mantis weapon battery, our second hits the shields, and the third reduces the Mantis to scrap. I hightail it to the sector exit one step ahead of the Rebels.
Picture of the Kestrel as at the end of Sector One
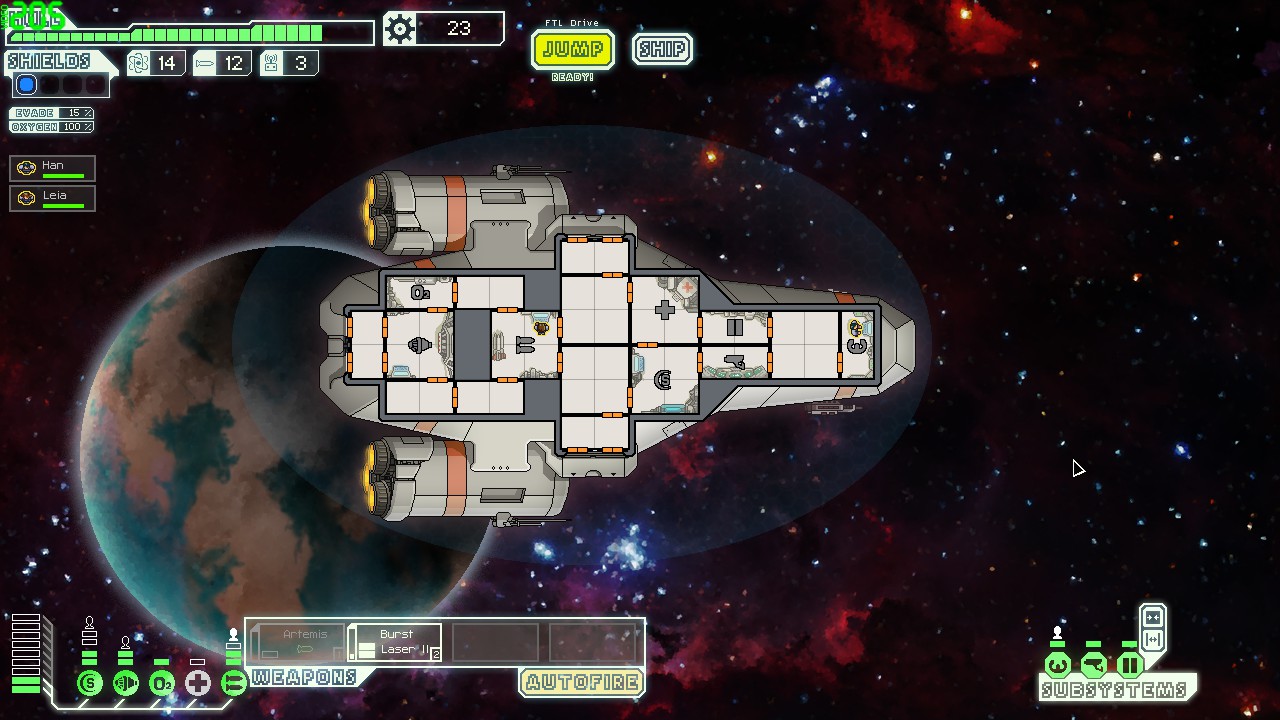
Sector Two: Pirate Space
For this sector, I had a choice of heading into either pirate or rebel space. The pirates seemed like easier foes, so off that way I went!
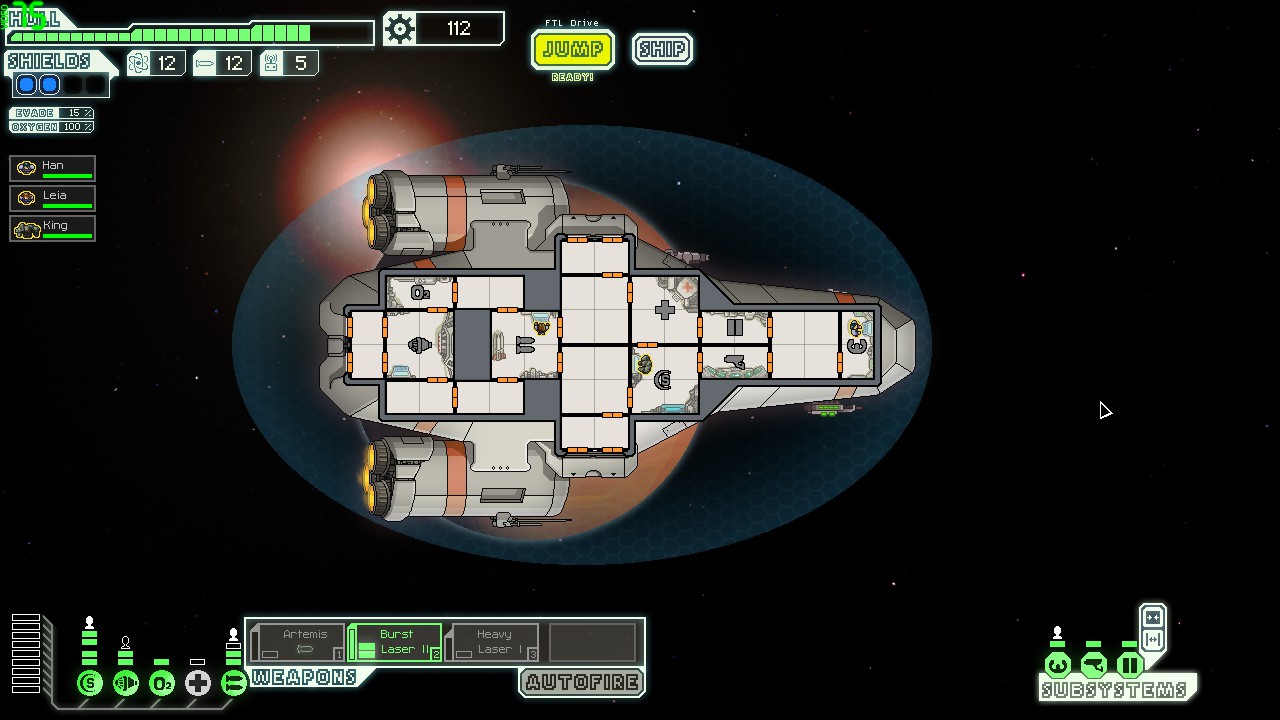
Along the way, I stop off to rescue the Federation base I heard about in the last sector. The Rebel ship attacking the base turns out to be just a scout – no match for the Kestrel – and soon I have not only more scrap, but a quest reward! After saving the base, I acquire a new crewman – a Rockman alien named King – and a new weapon, a heavy laser. The laser doesn’t seem too shabby, but the really big prize is the Rockman. Not only was I dangerously short-handed with only Han and Leia left, but Rockmen are great in their own right. They’re tough and immune to fire, which makes them perfect for repairing burning compartments or fighting hand-to-hand.
Soon enough, I deal with another Rebel – this one lurking inside an asteroid field – and pour some scrap into upgrading the ship’s power supply, so I can actually use the new laser. Then I investigate another distress beacon, and this time things go my way. It turns out to be a burning space station, and the Rockman promptly earns his pay:

The grateful scientists on board the station give me a new long-range sensor, and I scope out the sector:

As with Sector One, I have some time before the Rebel (the red line at the left) reaches me, so I should make the most of it. I’m in a decent position: I have an adequately armed and shielded (for the early game) ship, and a nice pool of scrap to play with. Where to next? With the sensor, I can see that the yellow triangles represent spaceships. Jumping to those locations will likely lead to battle, but the rewards (read: scrap) could be worth it. On the other hand, I could simply head into the nebula (the pink blob to the right). In the nebula my sensors would be blinded – carrying its own dangers – but the Rebel’s pursuit would also be slowed. In either case, things could go south in a hurry – or I could stumble across a remarkable find that would turn the Kestrel into a killing machine.
There is a lot of luck in this game, but that’s not necessarily a bad thing . That chanciness helps create a sense of exploration, a sense that I really am a starship captain racing through the unknown. And it often throws up interesting decisions – even if they’re as simple as, “do I roll the dice?” (see: the asteroid belt and space station back in Sector One).
But for now, I’ll have to leave those decisions for another day. “Get out while you’re ahead,” they say, and it looks like a pretty good time for me to close this episode of the LP. Stay tuned for the continuing adventures of the Kestrel, and I’ll see you next time!
I am quite addicted to FTL. My current normal run using the Engi Torus has hope if only I can find a damaging weapon soon (preferably before I leave the 3rd sector).
It has that effect, doesn’t it? Good luck on your run!